






Profile Perfect Level 87 Hints & Answer
"Village of Four Symbols" — a four-layer ladder: a one-click answer, hints that scale up, the logic explained, and the complete solution. Take only the layer you need.
Answer
Only here for the answer? Open the panel below and copy the grid into the game — nothing else gets spoiled.
SpoilerReveal the answer grid
| Subject | Subject | Name | House | Leader | Symbol | Main Food | Environment |
|---|---|---|---|---|---|---|---|
| Village A | Peverly | Boathouse | Stonade | Bone | Fish | Riverside | |
| Village B | Sunaro | Tatch Hut | Grarok | Rock | Fruit | Jungle | |
| Village C | Motunu | Tatch Hut | Moa | Wave | Fish | Beach | |
| Village D | Icano | Stone Hut | Onokh | Spark | Meat | Desert |
Hints
Hints unlock one at a time: open Hint 1, and only then does Hint 2 appear. Stop the moment the case clicks.
Hint 1 Tap to reveal
A clue that names Village A should be your first domino; don't try to fill from the right side first.
Hint 2 Tap to reveal
Some phrases like 'Tatch Hut villages live in Jungle and Beach' mean the same card can be used in more than one row. Attach it to a village whose Environment is already locked.
Hint 3 Tap to reveal
If a value seems missing, check duplicates first: Fish and Tatch Hut each appear twice. The final four cells are solved from leftover values after the clue counter reaches 9/12.
Video walkthrough
Watch the full solve: the board, the clue cards, and every placement in order — each step below is anchored to the moment it happens in the run.
-
1 Set the four village names 0:00 – 0:08
Lock the Name row first so every later clue has a fixed village letter.
Drag Peverly into Village A's Name cell, Sunaro into Village B's Name cell, and Icano into Village D's Name cell.
-
2 Pin Bone and Fish to Village A 0:08 – 0:14
Use A's direct clue to fill its Symbol and Main Food.
Drag Bone to Village A's Symbol cell and Fish to Village A's Main Food cell.
-
3 Pair Desert with Meat and Jungle with Fruit 0:14 – 0:22
Fill D and B by matching the two food-environment clues.
Drag Meat to D's Main Food, Desert to D's Environment, Jungle to B's Environment, and Fruit to B's Main Food.
-
4 Give B and C their Tatch Huts 0:22 – 0:30
Place the shared Tatch Hut value and put Beach on C.
Drag Tatch Hut to B's House cell, Tatch Hut to C's House cell, and Beach to C's Environment cell.
-
5 Place Wave, Spark, and Boathouse 0:30 – 0:37
Use the left/right and column-distance clues to link C, D, and A.
Drag Wave to Village C's Symbol cell, Spark to Village D's Symbol cell, and Boathouse to Village A's House cell.
-
6 Place the red-haired leaders last 0:37 – 0:43
Use the red-hair restriction to assign B/C first, then fill A/D.
Drag Grarok to Village B's Leader cell, Moa to Village C's Leader cell, Stonade to Village A's Leader cell, and Onokh to Village D's Leader cell.
-
7 Finish with leftover cards 0:43 – 0:50
Fill the last four cells from the remaining options and complete the 24-cell grid.
Drag Rock to Village B's Symbol cell, Stone Hut to Village D's House cell, Riverside to Village A's Environment cell, and Fish to Village C's Main Food cell. All cells are now filled and the victory screen appears.
Key moments
Three frames from the winning run: the opening board, mid-solve, and the completed grid.
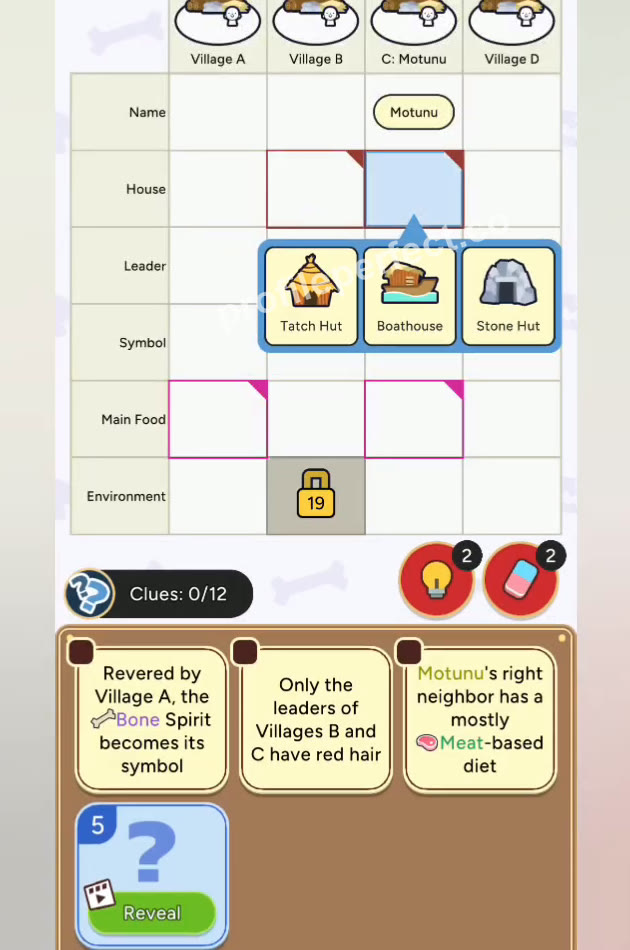
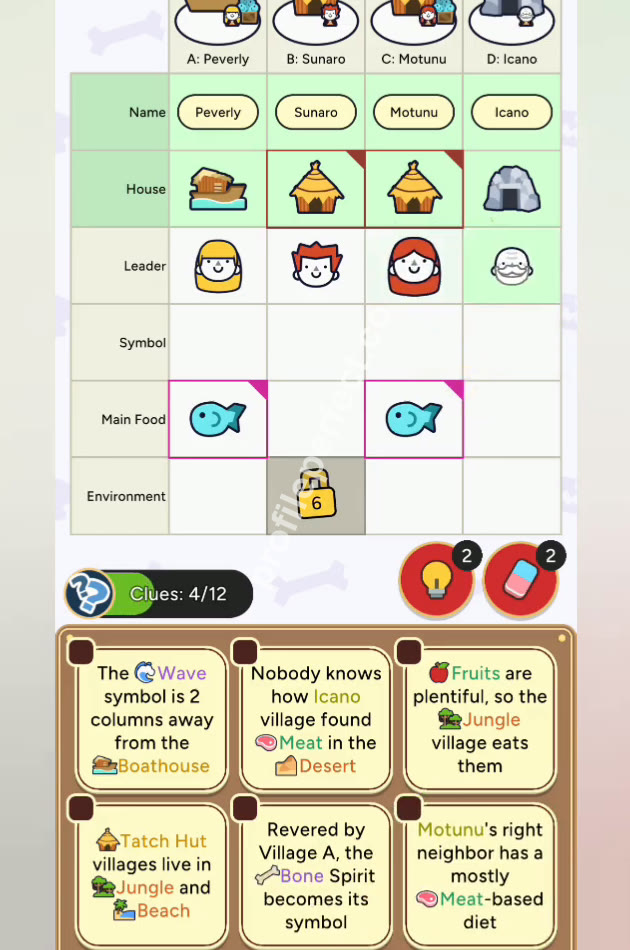
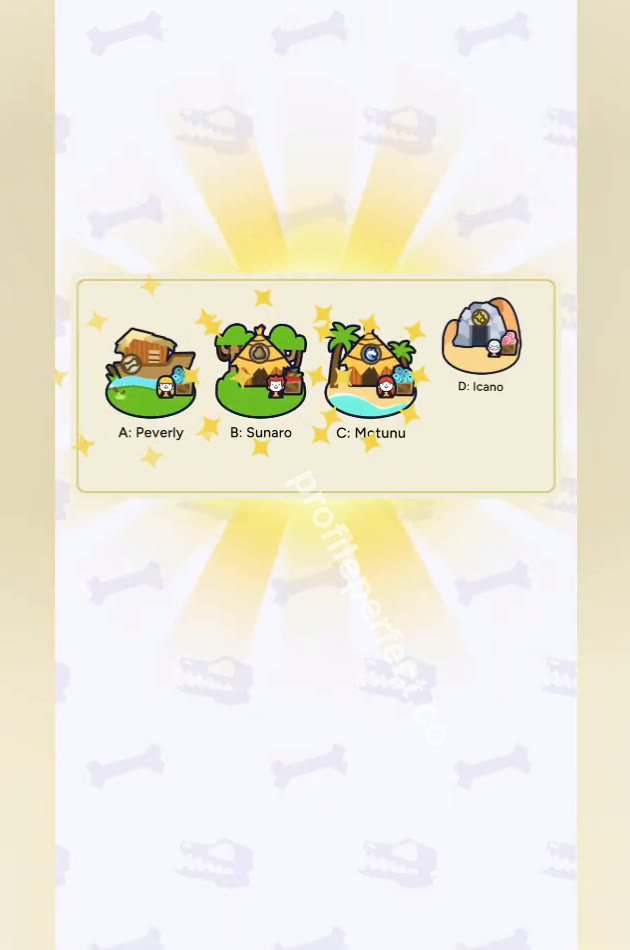
Trickiest clues
Fish and Tatch Hut are not unique
Fish appears in both Village A and Village C, and Tatch Hut appears in both B and C. Players often assume every card is single-use and lock too early. Leave the second copy until the final cleanup.
Beach goes with the other Tatch Hut, not with Jungle
Because B is already Jungle, some people assign Beach to B or make D the second Tatch Hut. The clue says Tatch Hut villages live in Jungle and Beach, so C is the other Tatch Hut and Beach goes to C.
Final check
Level 87 rewards anchoring with exact village letters: C's name is fixed, and A's Bone clue pins Fish. Shared values like Fish and Tatch Hut break the usual one-card-per-slot habit, so hold duplicates until the end. Once D and B pair up with Desert/Meat and Jungle/Fruit, the remaining cells solve themselves. The 9/12+ clue progress is your signal that the leftover placements are safe.
Categories in this level
Every board mixes everyday categories. Browse the ones this puzzle draws from — each links to every level that features it.
Frequently asked questions
What is the answer to Profile Perfect Level 87?
This page has the complete Level 87 "Village of Four Symbols" answer grid, kept inside a spoiler guard — open it and copy it into the game, or start from the layered hints if you want to solve it yourself first.
How many hints are there for Profile Perfect Level 87?
Three, in rising strength: a gentle nudge, the key clue called out, then the decisive step. Hints unlock one at a time, so you can stop as soon as the case clicks.
How to solve Profile Perfect Level 87 without boosters?
Follow the step-by-step section: anchor the direct clues first, sweep negative clues for eliminations, then chain the positional and comparison clues. Level 87 is fully solvable without spending a single booster.
Why did I lose a life on Profile Perfect Level 87?
A tap on an unproven pairing burns an attempt. The Tricky Clues list on this page covers the exact cells players mis-tap on this board — double-check them before you commit.
Is Profile Perfect Level 87 hard?
The "Village of Four Symbols" board sits at the expected difficulty for this stretch: a fair clue count with one or two easily misread wordings. Following the hint order keeps it comfortable.
What level comes after Profile Perfect Level 87?
Level 88. Use the previous / next buttons at the bottom of this page, or hop back to the full level index to browse by number.