






Dicas e solução do nível 190 de Profile Perfect
"Os maços de dinheiro" — uma escada de quatro camadas: uma resposta de um clique, dicas que aumentam, a lógica explicada e a solução completa. Pegue apenas a camada que precisar.
Solução
Só veio pela solução? Abra o painel abaixo e copie a grelha para o jogo — nada mais é revelado.
SpoilerRevelar a grelha de respostas
| Personagem | Personagens | Currency | Cor | Binder | Espessura |
|---|---|---|---|---|---|
| Maço A | Yen | Roxo | Rubber Band | 20 | |
| Maço B | Dollar | Amarelo | Paper / Blinder Clip | 50 | |
| Maço C | Ruble | Verde | Fita | 40 | |
| Maço D | Euro | Cinza | Paper Clip | 10 | |
| Maço E | Franc | Marrom | Clothespin | 30 |
Dicas
As dicas são liberadas uma de cada vez: abra a Dica 1, e só então a Dica 2 aparece. Pare no momento em que o caso fizer sentido.
Dica 1 Toque para revelar
Anchor yourself with the gray bundle: its two neighbors are green and brown, but check the Switzerland clue before choosing their exact spots.
Dica 2 Toque para revelar
Once colors are placed, focus on the binder row: the double-clip bundle sits next to the rubber band, and two binders separate the double clip from the clothespin.
Dica 3 Toque para revelar
For thickness, the two thickest bundles are neighbors and the brown bundle touches the thinnest one; the Franc bundle is thicker than the bundle farthest from it.
Vídeo do guia
Assista à resolução completa: o tabuleiro, os cartões de pista e cada colocação em ordem — cada passo abaixo está ancorado no momento em que acontece na execução.
-
1 E is Franc; green and brown flank gray 0:00 – 0:07
Place Franc on E and set the three color slots around the gray bundle.
Drag Franc to Bundle E's Currency. Drag Green to Bundle C's Color. Drag Brown to Bundle E's Color. Confirm Bundle D's Color stays Gray.
-
2 Dollar gets two clips; A gets the rubber band 0:07 – 0:14
Set the double clip on the famous currency bundle and put the rubber band next to it.
Drag Paper / Blinder Clip to Bundle B's Binder. Drag Rubber Band to Bundle A's Binder.
-
3 The two thickest bundles are adjacent 0:14 – 0:21
Place thickness 50 and 40 on the two neighboring thickest bundles.
Drag 50 to Bundle B's Thickness. Drag 40 to Bundle C's Thickness.
-
4 Brown's neighbor is thinnest; Franc is thicker than the farthest 0:21 – 0:28
Place the 10 next to the Brown bundle and the 30 on the Franc bundle.
Drag 10 to Bundle D's Thickness. Drag 30 to Bundle E's Thickness.
-
5 The binder row locks into place 0:28 – 0:35
Use the Brown bundle and the two-slot gap to finish all remaining Binder slots.
Drag Clothespin to Bundle E's Binder. Drag Ribbon to Bundle C's Binder. Drag Paper Clip to Bundle D's Binder.
-
6 Finish with currency and color 0:35 – 0:42
Fill the last Currency and Color slots, keep Bundle A's Thickness at 20, and complete the grid.
Drag Yen to Bundle A's Currency, Dollar to Bundle B's Currency, Ruble to Bundle C's Currency, Purple to Bundle A's Color, and Yellow to Bundle B's Color. Confirm Bundle A's Thickness stays 20. Once all 20 cells are filled, the victory screen appears.
Momentos-chave
Três quadros da execução vencedora: o tabuleiro inicial, meio da resolução e a grelha completa.
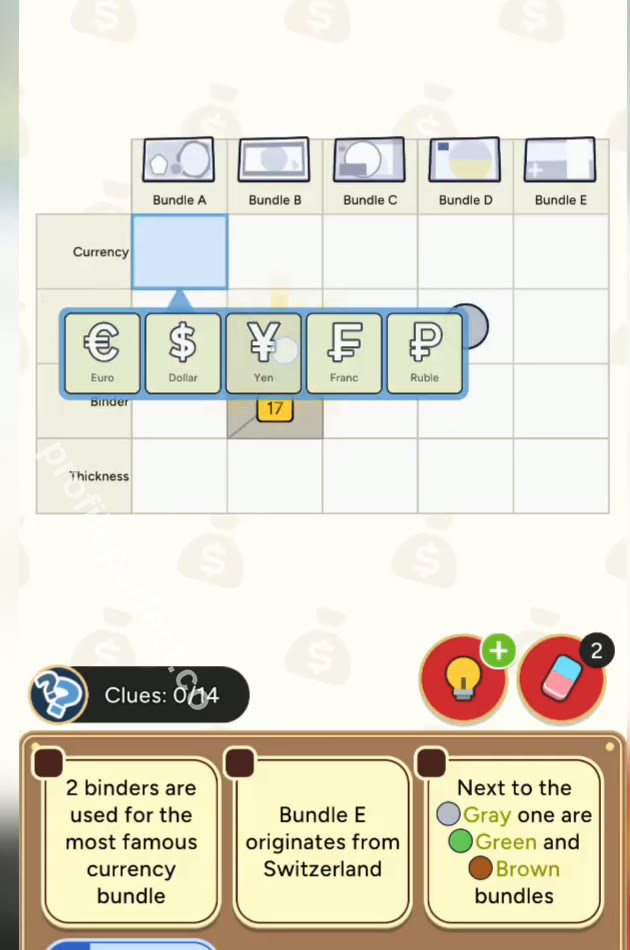
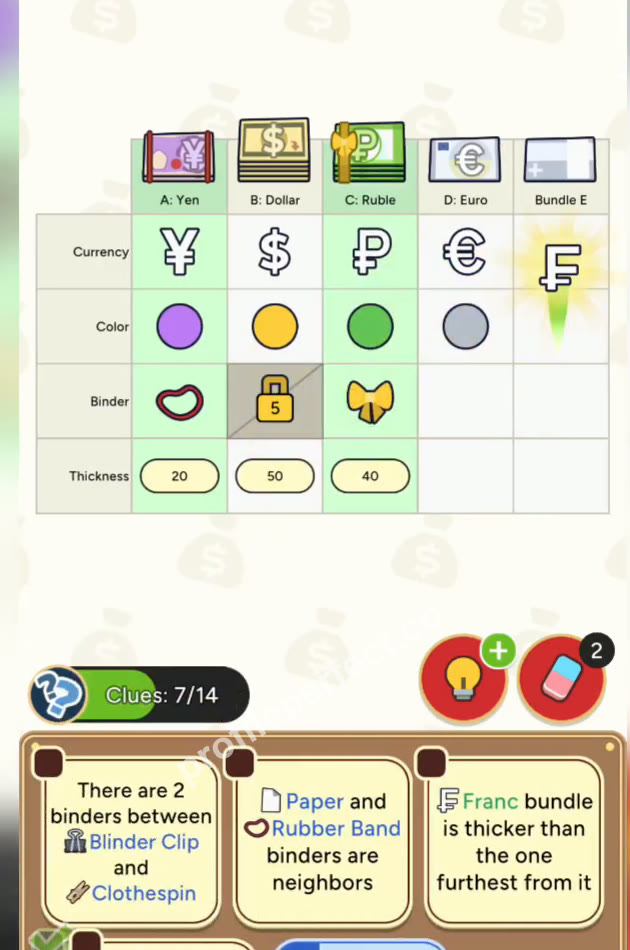
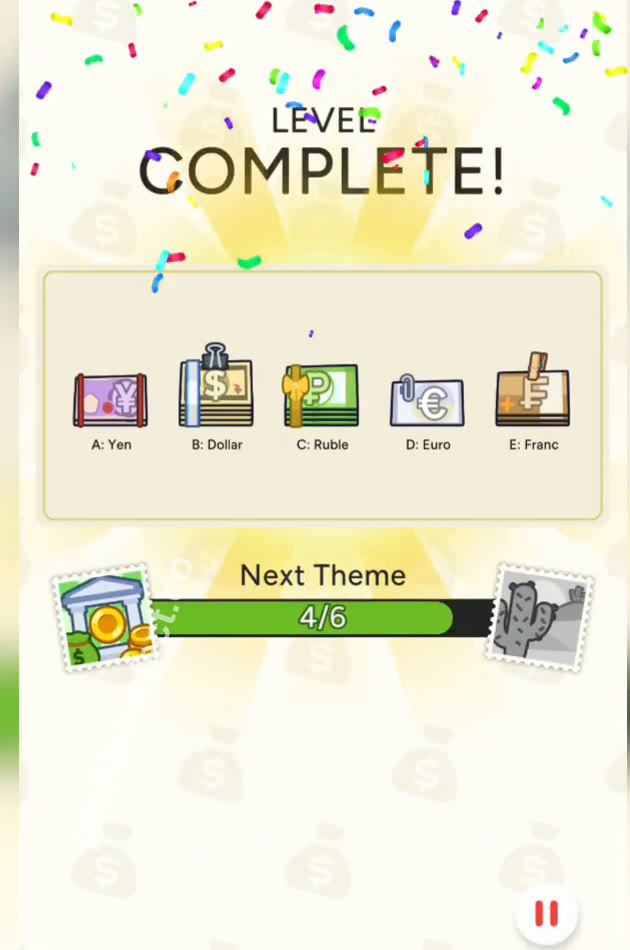
Pistas mais complicadas
Misreading the 'famous currency' clue
The double clip belongs to the most famous currency bundle, which is the Dollar row, not the first bundle just because it is listed first. Let the currency clues narrow it down before dropping a binder.
Counting 'between' as adjacent
When a clue says there are 2 binders between the Blinder Clip and the Clothespin, it means two slots sit between them, not that they are next to each other. In a five-bundle line, that places the Clothespin at one end with two middle slots filled in.
Verificação final
Start with the colors around the gray bundle and use the Switzerland clue to lock Franc onto E. Once the colors are down, the binder row becomes a positional puzzle: double clip next to rubber band, clothespin two slots away from it. The thickness clues then confirm the remaining numbers, and the final currency and color fill feels like a satisfying payoff. The key is to treat every clue as a positional constraint, not a simple 'put X on Y' instruction.
Perguntas frequentes
Qual é a solução do Profile Perfect Nível 190?
Esta página tem a grade de solução completa do Nível 190 "Os maços de dinheiro", mantida dentro de uma proteção de spoiler — abra-a e copie para o jogo, ou comece pelas dicas em camadas se quiser resolver primeiro.
Quantas dicas existem para o Profile Perfect Nível 190?
Três, em força crescente: um leve empurrão, a pista principal destacada, depois o passo decisivo. As dicas são desbloqueadas uma de cada vez, para que você possa parar assim que o caso fizer sentido.
Como resolver o Profile Perfect Nível 190 sem reforços?
Siga a seção passo a passo: ancore as pistas diretas primeiro, varra as pistas negativas para eliminações, depois encadeie as pistas posicionais e de comparação. O Nível 190 é totalmente solucionável sem gastar um único reforço.
Por que perdi uma vida no Profile Perfect Nível 190?
Um toque em um par não comprovado queima uma tentativa. A lista de Pistas Enganosas nesta página cobre as células exatas que os jogadores tocam erroneamente neste quadro — verifique-as duas vezes antes de confirmar.
O Profile Perfect Nível 190 é Difícil?
O quadro "Os maços de dinheiro" está na dificuldade esperada para esta fase: uma contagem justa de pistas com uma ou duas redações fáceis de serem lidas errado. Seguir a ordem das dicas mantém confortável.
Qual nível vem depois do Profile Perfect Nível 190?
Nível 191. Use os botões anterior / próximo na parte inferior desta página, ou volte ao índice completo de níveis para navegar por número.