






Profile Perfect Nivel 190 — Pista por pista y solución
"Los fardos de efectivo" — una escalera de cuatro capas: una solución con un clic, pistas por pista que aumentan, la lógica explicada y la solución completa. Toma solo la capa que necesitas.
Solución
¿Solo buscas la solución? Abre el panel de abajo y copia la cuadrícula en el juego: no se estropea nada más.
SpoilerRevelar la cuadrícula de solución
| Personajes | Personaje | Currency | Color | Binder | Grosor |
|---|---|---|---|---|---|
| Fajo A | Yen | Púrpura | Rubber Band | 20 | |
| Fajo B | Dollar | Amarillo | Paper / Blinder Clip | 50 | |
| Fajo C | Ruble | Verde | Cinta | 40 | |
| Fajo D | Euro | Gris | Paper Clip | 10 | |
| Fajo E | Franc | Marrón | Clothespin | 30 |
Pistas por pista
Las pistas por pista se desbloquean una a una: abre la Pista por pista 1, y solo entonces aparece la Pista por pista 2. Detente en cuanto el caso haga clic.
Pista por pista 1 Toca para revelar
Anchor yourself with the gray bundle: its two neighbors are green and brown, but check the Switzerland clue before choosing their exact spots.
Pista por pista 2 Toca para revelar
Once colors are placed, focus on the binder row: the double-clip bundle sits next to the rubber band, and two binders separate the double clip from the clothespin.
Pista por pista 3 Toca para revelar
For thickness, the two thickest bundles are neighbors and the brown bundle touches the thinnest one; the Franc bundle is thicker than the bundle farthest from it.
Videoguía
Mira la resolución completa: el tablero, las tarjetas de pistas del caso y cada colocación en orden — cada paso más abajo está anclado al momento en que ocurre en la ejecución.
-
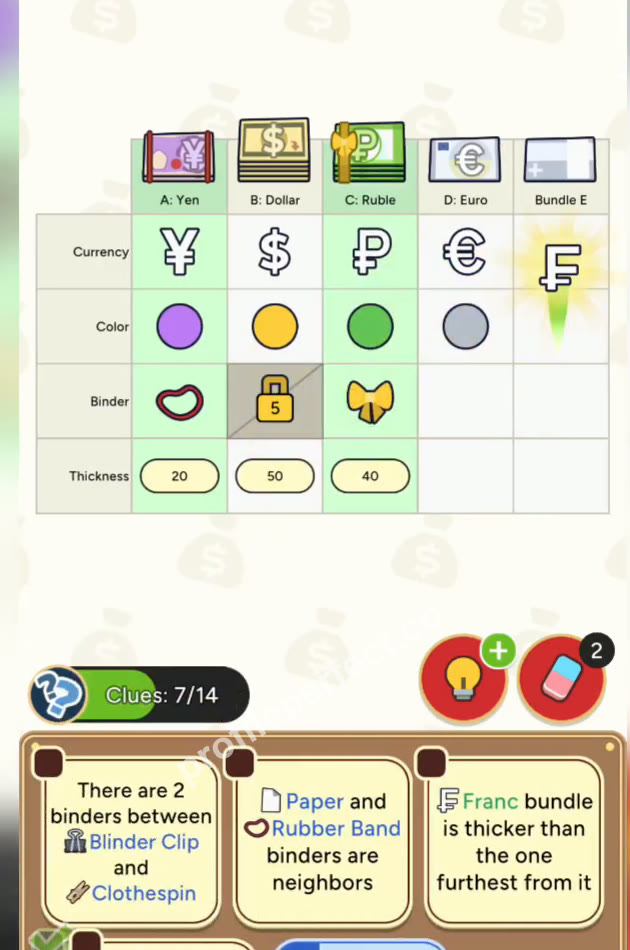
1 E is Franc; green and brown flank gray 0:00 – 0:07
Place Franc on E and set the three color slots around the gray bundle.
Drag Franc to Bundle E's Currency. Drag Green to Bundle C's Color. Drag Brown to Bundle E's Color. Confirm Bundle D's Color stays Gray.
-
2 Dollar gets two clips; A gets the rubber band 0:07 – 0:14
Set the double clip on the famous currency bundle and put the rubber band next to it.
Drag Paper / Blinder Clip to Bundle B's Binder. Drag Rubber Band to Bundle A's Binder.
-
3 The two thickest bundles are adjacent 0:14 – 0:21
Place thickness 50 and 40 on the two neighboring thickest bundles.
Drag 50 to Bundle B's Thickness. Drag 40 to Bundle C's Thickness.
-
4 Brown's neighbor is thinnest; Franc is thicker than the farthest 0:21 – 0:28
Place the 10 next to the Brown bundle and the 30 on the Franc bundle.
Drag 10 to Bundle D's Thickness. Drag 30 to Bundle E's Thickness.
-
5 The binder row locks into place 0:28 – 0:35
Use the Brown bundle and the two-slot gap to finish all remaining Binder slots.
Drag Clothespin to Bundle E's Binder. Drag Ribbon to Bundle C's Binder. Drag Paper Clip to Bundle D's Binder.
-
6 Finish with currency and color 0:35 – 0:42
Fill the last Currency and Color slots, keep Bundle A's Thickness at 20, and complete the grid.
Drag Yen to Bundle A's Currency, Dollar to Bundle B's Currency, Ruble to Bundle C's Currency, Purple to Bundle A's Color, and Yellow to Bundle B's Color. Confirm Bundle A's Thickness stays 20. Once all 20 cells are filled, the victory screen appears.
Momentos clave
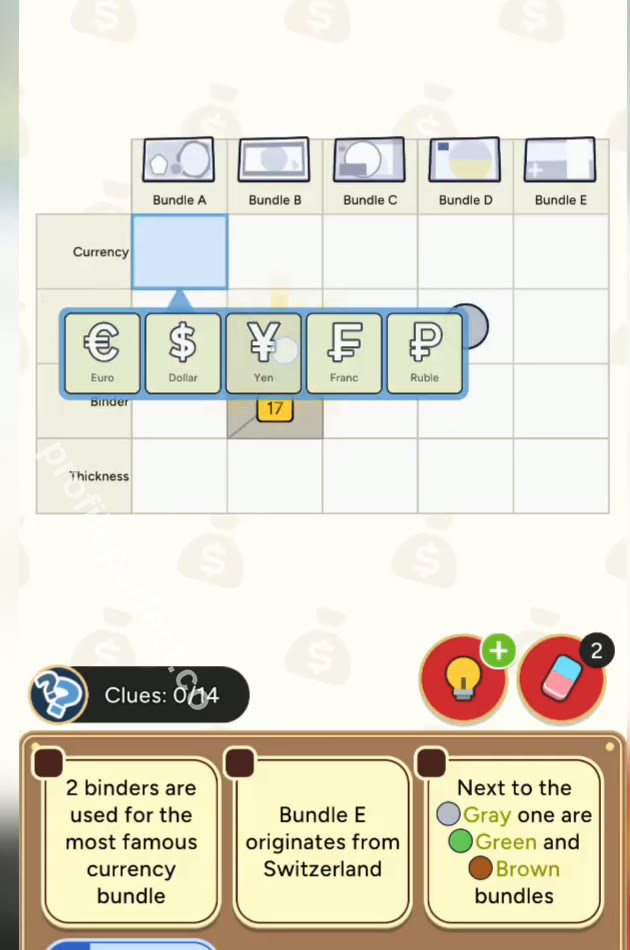
Tres fotogramas de la ejecución ganadora: el tablero inicial, a mitad de resolución y la rejilla completada.

Pistas del caso más engañosas
Misreading the 'famous currency' clue
The double clip belongs to the most famous currency bundle, which is the Dollar row, not the first bundle just because it is listed first. Let the currency clues narrow it down before dropping a binder.
Counting 'between' as adjacent
When a clue says there are 2 binders between the Blinder Clip and the Clothespin, it means two slots sit between them, not that they are next to each other. In a five-bundle line, that places the Clothespin at one end with two middle slots filled in.
Comprobación final
Start with the colors around the gray bundle and use the Switzerland clue to lock Franc onto E. Once the colors are down, the binder row becomes a positional puzzle: double clip next to rubber band, clothespin two slots away from it. The thickness clues then confirm the remaining numbers, and the final currency and color fill feels like a satisfying payoff. The key is to treat every clue as a positional constraint, not a simple 'put X on Y' instruction.
Preguntas frecuentes
¿Cuál es la solución del nivel 190 de Profile Perfect?
Esta página tiene la cuadrícula de solución completa del nivel 190 "Los fardos de efectivo", guardada dentro de una protección contra spoilers: ábrela y cópiala en el juego, o comienza con las pistas por pista si quieres resolverlo tú primero.
¿Cuántas pistas por pista hay para el nivel 190 de Profile Perfect?
Tres, en intensidad creciente: un empujón suave, la pista del caso clave señalada, luego el paso decisivo. Las pistas por pista se desbloquean una a una, para que puedas parar en cuanto el caso tenga sentido.
¿Cómo resolver el nivel 190 de Profile Perfect sin potenciadores?
Sigue la sección paso a paso: ancla primero las pistas directas, barre las pistas negativas para eliminaciones, luego encadena las pistas de posición y de comparación. El nivel 190 se puede resolver completamente sin gastar un solo potenciador.
¿Por qué perdí una vida en el nivel 190 de Profile Perfect?
Un toque en un par no comprobado quema un intento. La lista de Pistas del Caso Engañosas en esta página cubre las celdas exactas donde los jugadores tocan mal en este tablero: verifícalas antes de confirmar.
¿El nivel 190 de Profile Perfect es difícil?
El tablero "Los fardos de efectivo" está en la dificultad esperada para este tramo: una cantidad justa de pistas del caso con una o dos redacciones fáciles de malinterpretar. Seguir el orden de las pistas por pista lo mantiene cómodo.
¿Qué nivel viene después del nivel 190 de Profile Perfect?
Nivel 191. Usa los botones anterior/siguiente al final de esta página, o vuelve al índice completo de niveles para explorar por número.