






Profile Perfect Nivel 270 — Pista por pista y solución
"The Freezer Conundrum" — una escalera de cuatro capas: una solución con un clic, pistas por pista que aumentan, la lógica explicada y la solución completa. Toma solo la capa que necesitas.
Solución
¿Solo buscas la solución? Abre el panel de abajo y copia la cuadrícula en el juego: no se estropea nada más.
SpoilerRevelar la cuadrícula de solución
| Personajes | Subject | Color | Brand | Content | Energy Source |
|---|---|---|---|---|---|
| Freezer A | Blue | Damsang | Vial | Battery | |
| Freezer B | Black | Pear | Sample | Windmill | |
| Freezer C | Beige | AutoY | Bomb | Water Wheel / Solar Cell |
Pistas por pista
Las pistas por pista se desbloquean una a una: abre la Pista por pista 1, y solo entonces aparece la Pista por pista 2. Detente en cuanto el caso haga clic.
Pista por pista 1 Toca para revelar
Lock down the freezer that is already fully described before guessing anything.
Pista por pista 2 Toca para revelar
Use 'does not' clues to eliminate rows, and remember safe energy sources never contain the Bomb.
Pista por pista 3 Toca para revelar
Pair the '2 columns away' distance with the left-right wind/sun order to finish the energy row.
Videoguía
Mira la resolución completa: el tablero, las tarjetas de pistas del caso y cada colocación en orden — cada paso más abajo está anclado al momento en que ocurre en la ejecución.
-
1 Start with the Vial anchor 0:00 – 0:04
Set Freezer A's Content to Vial and remember that AutoY does not make the Black freezer.
Drag the Vial content card to Freezer A's Content cell.
-
2 Match colors and brands 0:04 – 0:08
Place Blue, Black, and Beige as the freezer colors, then assign Damsang to Freezer A and AutoY to Freezer C.
Drag Blue to Freezer A's Color cell, Black to Freezer B's Color cell, Beige to Freezer C's Color cell, Damsang to Freezer A's Brand cell, and AutoY to Freezer C's Brand cell.
-
3 Deduce the contents 0:08 – 0:14
Set Freezer B's Content to Sample and Freezer C's Content to Bomb.
Drag Sample to Freezer B's Content cell and Bomb to Freezer C's Content cell.
-
4 Place the energy sources 0:14 – 0:20
Set Freezer A's Energy Source to Battery and Freezer B's to Windmill.
Drag Battery to Freezer A's Energy Source cell and Windmill to Freezer B's Energy Source cell.
-
5 Fill the dual energy cell 0:20 – 0:26
Set Freezer C's Energy Source to the Water Wheel / Solar Cell dual value.
Drag the Water Wheel / Solar Cell dual-energy card to Freezer C's Energy Source cell.
-
6 Finish with the Pear brand 0:26 – 0:38
Place Pear as Freezer B's Brand to complete all 15 cells and clear the level.
Drag the Pear brand card to Freezer B's Brand cell, fill the grid, and enter the LEVEL COMPLETE screen.
Momentos clave
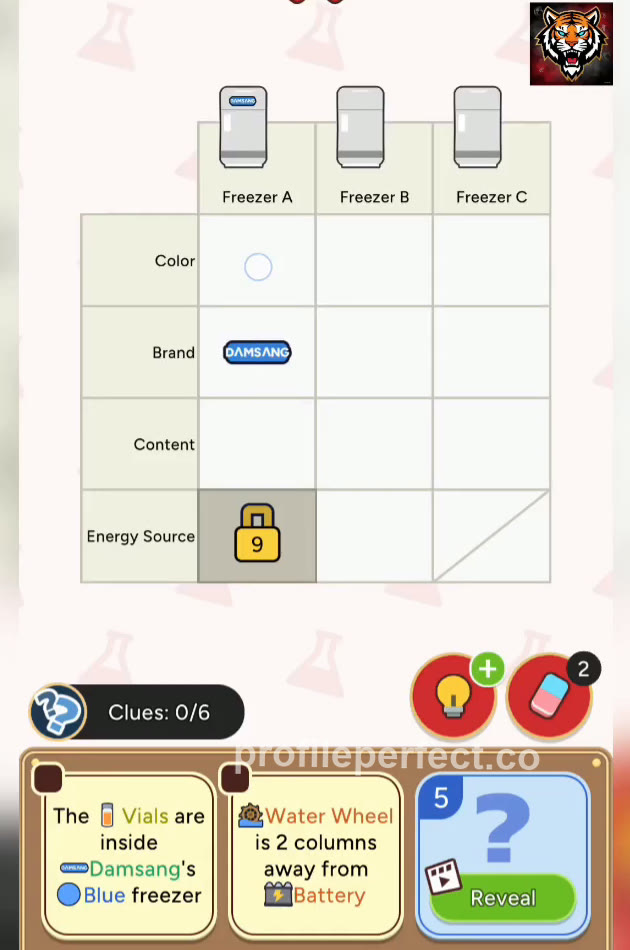
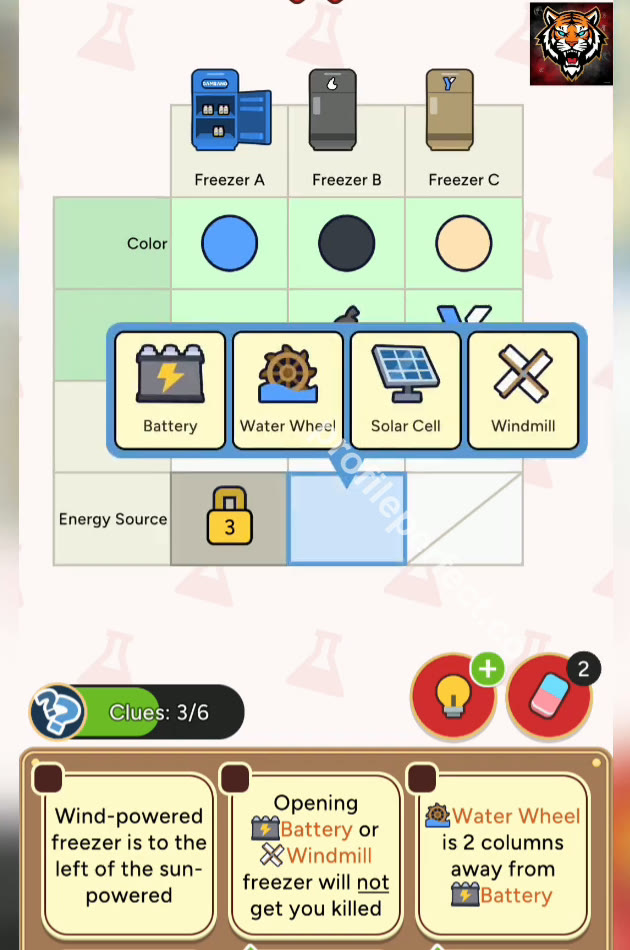
Tres fotogramas de la ejecución ganadora: el tablero inicial, a mitad de resolución y la rejilla completada.

Pistas del caso más engañosas
Counting '2 columns away'
On a three-column grid, '2 columns away' puts Battery and Water Wheel at the endpoints A and C, not at B. It is easy to drop one in B, but B is only one column away from either end, so count the column distance before dragging.
Misreading 'safe' as a bomb clue
The clue says opening the Battery or Windmill freezer will not get you killed; that only rules out Bomb for those two. Since B's Energy is Windmill, B gets Sample and C gets Bomb by elimination, so don't place the Bomb based on the safety clue alone.
Comprobación final
This level rewards anchoring the obvious clue before doing risky elimination. The Vial clue locks one freezer's color, brand, and content together. After that, negatives like 'not Black' and 'not lethal' do the dirty work, while distance and left-right clues resolve the energy grid. The leftover brand is the clean final win.
Preguntas frecuentes
¿Cuál es la solución del nivel 270 de Profile Perfect?
Esta página tiene la cuadrícula de solución completa del nivel 270 "The Freezer Conundrum", guardada dentro de una protección contra spoilers: ábrela y cópiala en el juego, o comienza con las pistas por pista si quieres resolverlo tú primero.
¿Cuántas pistas por pista hay para el nivel 270 de Profile Perfect?
Tres, en intensidad creciente: un empujón suave, la pista del caso clave señalada, luego el paso decisivo. Las pistas por pista se desbloquean una a una, para que puedas parar en cuanto el caso tenga sentido.
¿Cómo resolver el nivel 270 de Profile Perfect sin potenciadores?
Sigue la sección paso a paso: ancla primero las pistas directas, barre las pistas negativas para eliminaciones, luego encadena las pistas de posición y de comparación. El nivel 270 se puede resolver completamente sin gastar un solo potenciador.
¿Por qué perdí una vida en el nivel 270 de Profile Perfect?
Un toque en un par no comprobado quema un intento. La lista de Pistas del Caso Engañosas en esta página cubre las celdas exactas donde los jugadores tocan mal en este tablero: verifícalas antes de confirmar.
¿El nivel 270 de Profile Perfect es difícil?
El tablero "The Freezer Conundrum" está en la dificultad esperada para este tramo: una cantidad justa de pistas del caso con una o dos redacciones fáciles de malinterpretar. Seguir el orden de las pistas por pista lo mantiene cómodo.
¿Qué nivel viene después del nivel 270 de Profile Perfect?
Nivel 271. Usa los botones anterior/siguiente al final de esta página, o vuelve al índice completo de niveles para explorar por número.