






Profile Perfect Level 187 Hints & Answer
"The Masked Getaway" — a four-layer ladder: a one-click answer, hints that scale up, the logic explained, and the complete solution. Take only the layer you need.
Answer
Only here for the answer? Open the panel below and copy the grid into the game — nothing else gets spoiled.
SpoilerReveal the answer grid
| Subject | Subject | Mask | Tool | Vehicle | Heist Outcome |
|---|---|---|---|---|---|
| Thief A | Mask | Grappling Hook | Forklift | Alarm | |
| Thief B | Balaclava | Crowbar | Skateboard | Jail | |
| Thief C | Mouth Wrap | Lockpick / Rope | Scooter | Locked Inside | |
| Thief D | None | Fake Keycard | Roller Skates | Hospital |
Hints
Hints unlock one at a time: open Hint 1, and only then does Hint 2 appear. Stop the moment the case clicks.
Hint 1 Tap to reveal
Start with the thief whose Mask and Vehicle are both blank. The clue about a Balaclava and a Skateboard hands you that whole pair.
Hint 2 Tap to reveal
Keep the Scooter exactly where it is. The silent lockpick thief already has their ride, so you only need to add the Mouth Wrap and the Lockpick / Rope tool.
Hint 3 Tap to reveal
Let the 'Forklift is not beside the Scooter' clue fix Thief A's vehicle, then use the 'entered from the roof' clue to settle the remaining Heist Outcome slots.
Video walkthrough
Watch the full solve: the board, the clue cards, and every placement in order — each step below is anchored to the moment it happens in the run.
-
1 B gets the Balaclava and the Skateboard 0:00 – 0:06
Place the first confirmed mask-and-vehicle pair on Thief B.
Drag the Balaclava card into Thief B's Mask slot, and drag the Skateboard card into Thief B's Vehicle slot.
-
2 C is the silent lockpicker with the Mouth Wrap 0:06 – 0:11
Set Thief C's missing mask and tool while keeping their preassigned scooter.
Drag the Mouth Wrap card into Thief C's Mask slot, drag the Lockpick / Rope card into Thief C's Tool slot, and confirm Thief C's Vehicle slot stays as Scooter.
-
3 B takes the Crowbar and Jail; A takes the Forklift 0:11 – 0:17
Give the heavy-tool user their caught outcome, then use the positional clue to place A's vehicle.
Drag the Crowbar card into Thief B's Tool slot, drag the Jail card into Thief B's Heist Outcome slot, and drag the Forklift card into Thief A's Vehicle slot.
-
4 A enters from the roof with the Grappling Hook; finish C and D outcomes 0:17 – 0:23
Assign A's rooftop tool/outcome, then fill the remaining two Heist Outcome slots.
Drag the Grappling Hook card into Thief A's Tool slot, drag the Alarm card into Thief A's Heist Outcome slot, drag the Locked Inside card into Thief C's Heist Outcome slot, and drag the Hospital card into Thief D's Heist Outcome slot.
-
5 Wrap up: D is bare-faced, uses Fake Keycard, and wears Roller Skates 0:23 – 0:29
Complete the last empty slots so all 16 cells are correct and trigger the completion screen.
Drag the None card into Thief D's Mask slot, drag the Fake Keycard card into Thief D's Tool slot, drag the Roller Skates card into Thief D's Vehicle slot, drag the Mask card into Thief A's Mask slot, then confirm the completion screen appears.
Key moments
Three frames from the winning run: the opening board, mid-solve, and the completed grid.
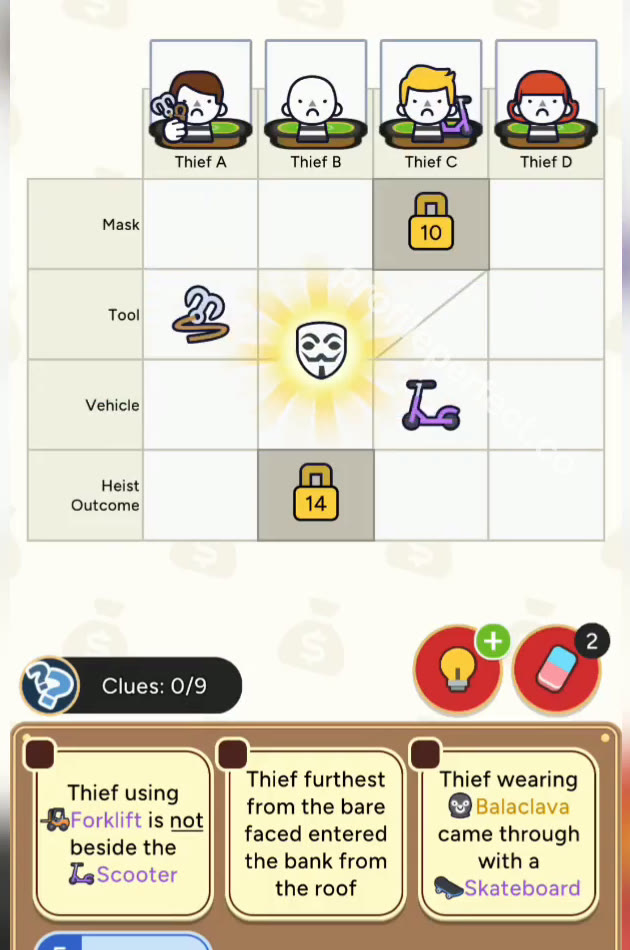
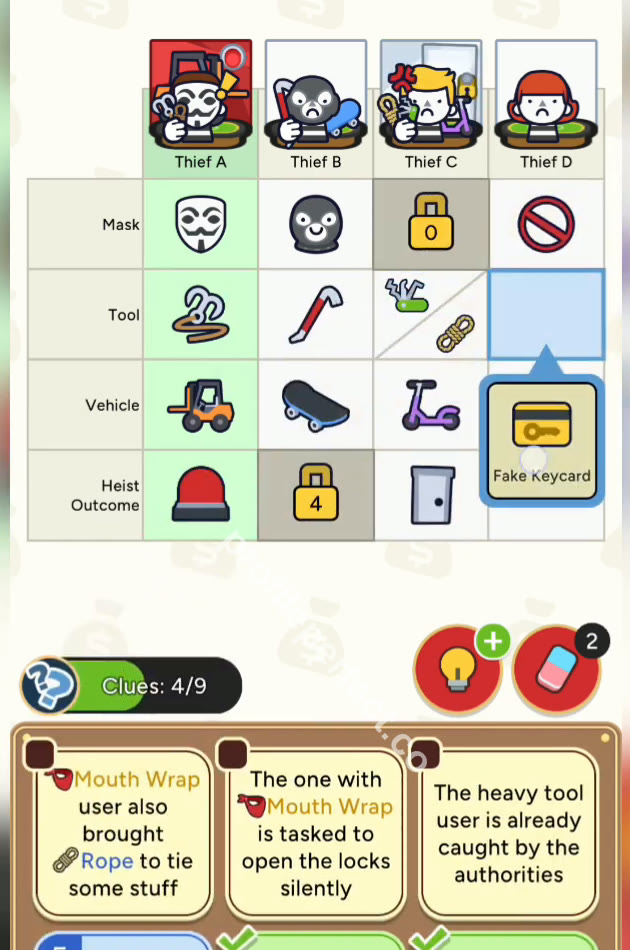
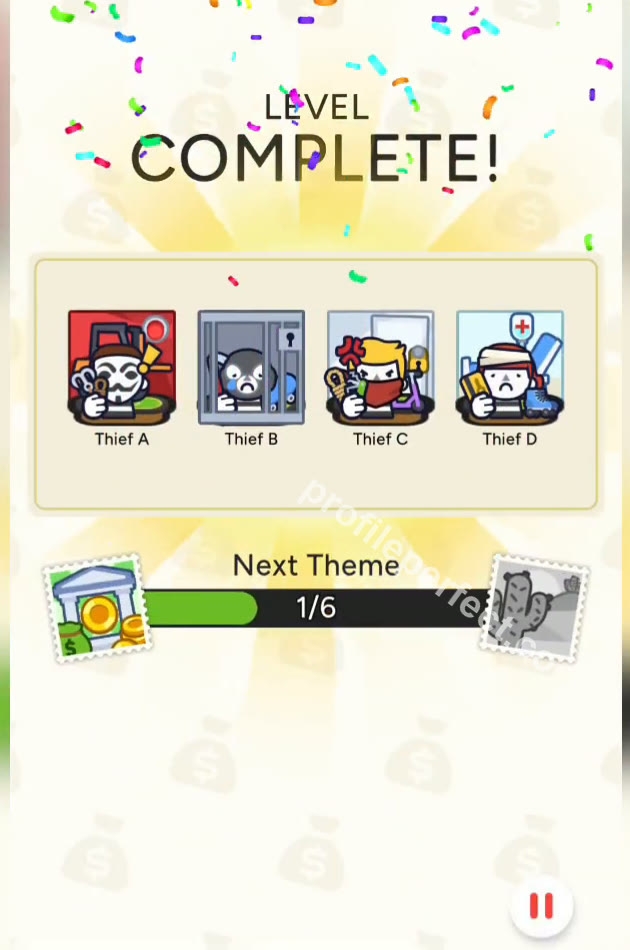
Trickiest clues
'Not beside' means position, not vehicle type
The clue says the Forklift user is not beside the Scooter user, so it doesn't mean 'doesn't own a Scooter.' Because Thief C has the Scooter, the thieves next to C are ruled out, and Thief A is the only non-adjacent slot left. Keep the seating order in mind before you drag.
Don't confuse the generic Mask with the bare-faced thief
When only one Mask card is left, it's easy to put it on Thief D. But D is the bare-faced thief, so the correct card for D's Mask slot is None. Place None first, and the remaining generic Mask will fall into Thief A's slot automatically.
Final check
The key to this level is anchoring every clue to the thief whose slots are still empty. Once B and C were locked in, the 'not beside' clue made A's vehicle obvious, and the rooftop clue resolved the remaining outcomes. I almost rushed the last Mask card, but confirming D's bare face first made the finish clean. If the clue progress reaches 9/9, you can trust that all remaining blanks are determined.
Categories in this level
Every board mixes everyday categories. Browse the ones this puzzle draws from — each links to every level that features it.
Frequently asked questions
What is the answer to Profile Perfect Level 187?
This page has the complete Level 187 "The Masked Getaway" answer grid, kept inside a spoiler guard — open it and copy it into the game, or start from the layered hints if you want to solve it yourself first.
How many hints are there for Profile Perfect Level 187?
Three, in rising strength: a gentle nudge, the key clue called out, then the decisive step. Hints unlock one at a time, so you can stop as soon as the case clicks.
How to solve Profile Perfect Level 187 without boosters?
Follow the step-by-step section: anchor the direct clues first, sweep negative clues for eliminations, then chain the positional and comparison clues. Level 187 is fully solvable without spending a single booster.
Why did I lose a life on Profile Perfect Level 187?
A tap on an unproven pairing burns an attempt. The Tricky Clues list on this page covers the exact cells players mis-tap on this board — double-check them before you commit.
Is Profile Perfect Level 187 hard?
The "The Masked Getaway" board sits at the expected difficulty for this stretch: a fair clue count with one or two easily misread wordings. Following the hint order keeps it comfortable.
What level comes after Profile Perfect Level 187?
Level 188. Use the previous / next buttons at the bottom of this page, or hop back to the full level index to browse by number.