






Dicas e solução do nível 162 de Profile Perfect
"A linha do estádio" — uma escada de quatro camadas: uma resposta de um clique, dicas que aumentam, a lógica explicada e a solução completa. Pegue apenas a camada que precisar.
Solução
Só veio pela solução? Abra o painel abaixo e copie a grelha para o jogo — nada mais é revelado.
SpoilerRevelar a grelha de respostas
| Personagem | Personagens | Court | Seat Color | Entrance | Capacidade |
|---|---|---|---|---|---|
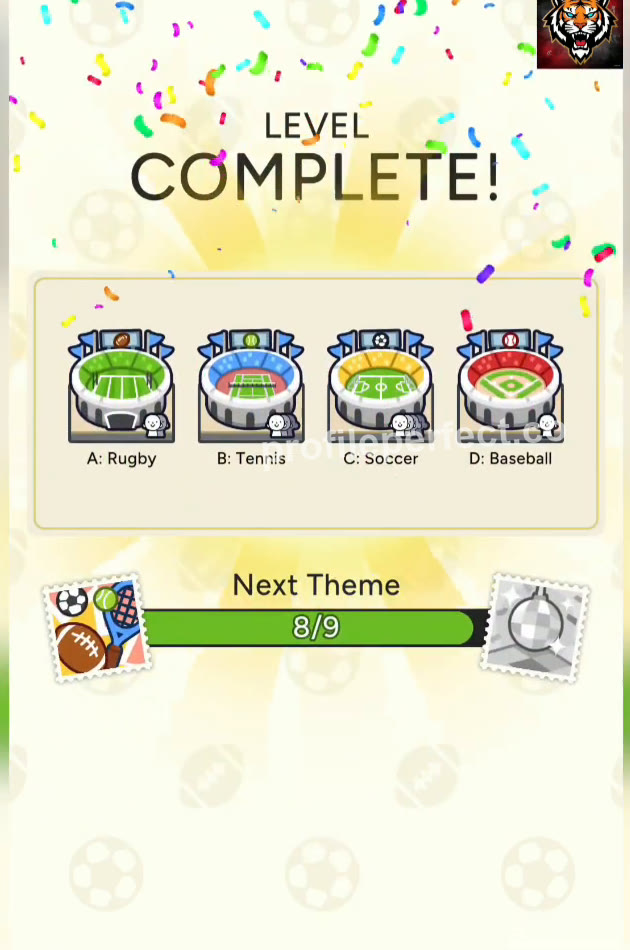
| Estádio A | Rúgbi | Verde | Sul | Cap2 | |
| Estádio B | Tênis | Azul | Oeste | Cap3 | |
| Estádio C | Futebol | Amarelo | Leste | Cap4 | |
| Estádio D | Beisebol | Vermelho | Norte | Cap1 |
Dicas
As dicas são liberadas uma de cada vez: abra a Dica 1, e só então a Dica 2 aparece. Pare no momento em que o caso fizer sentido.
Dica 1 Toque para revelar
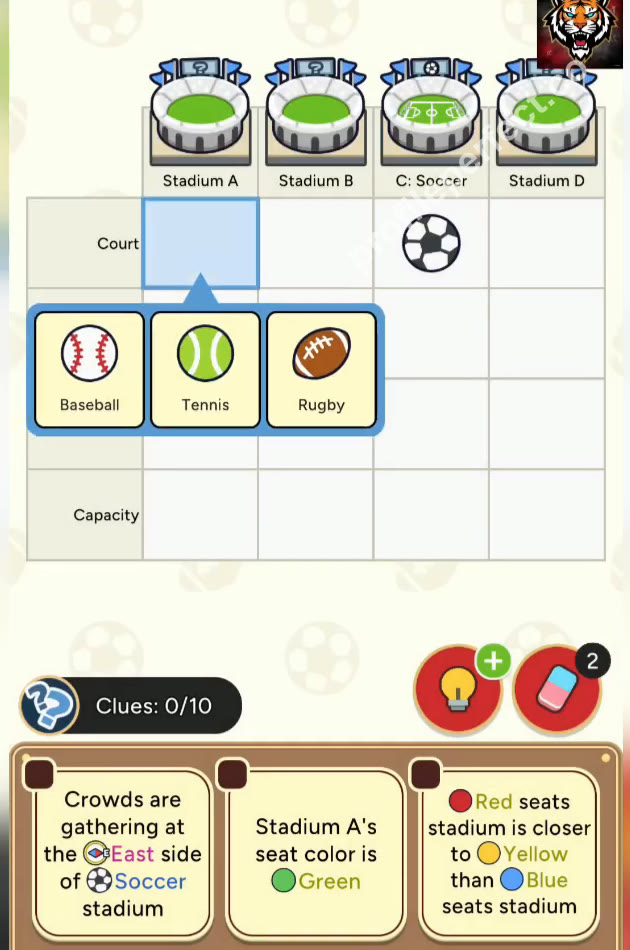
Start with the stadium that already has its sport labeled on the board. The entrance clue tells you where to put the first two direction cards.
Dica 2 Toque para revelar
Pay attention to the neighbor rule about entrances, and the seat color clues that link sports to colors.
Dica 3 Toque para revelar
Once red seats are placed, the capacity clue directly ties to that stadium. The rest fills in by elimination.
Vídeo do guia
Assista à resolução completa: o tabuleiro, os cartões de pista e cada colocação em ordem — cada passo abaixo está ancorado no momento em que acontece na execução.
-
1 Set East entrance for Stadium C and South for Stadium A 0:00 – 0:06
Place the first two entrance directions based on the opening clues.
Drag the East card to Stadium C's Entrance slot, and the South card to Stadium A's Entrance slot.
-
2 Assign Green to A and Blue to B 0:06 – 0:13
Fill in seat colors for A and B using direct color clues.
Drag the Green card to Stadium A's Seat Color slot, and the Blue card to Stadium B's Seat Color slot.
-
3 Set West entrance for B and Yellow for C 0:13 – 0:20
Use the neighbor entrance rule and the distance clue to complete B's entrance and C's seat color.
Confirm Stadium B has Tennis as its sport, drag the West card to B's Entrance slot, and drag the Yellow card to C's Seat Color slot.
-
4 Give Red to D and North entrance to D 0:20 – 0:24
Complete D's seat color and entrance by elimination.
Drag the Red card to Stadium D's Seat Color slot, and the North card to Stadium D's Entrance slot.
-
5 Set Baseball and Cap1 for D 0:24 – 0:28
Assign the remaining sport and the smallest capacity to D.
Drag the Baseball card to Stadium D's Court slot, and the Cap1 card to D's Capacity slot.
-
6 Fill remaining capacities and confirm sports 0:28 – 0:33
Complete A, B, C capacities and verify the final grid to win.
Drag Cap2 to A's Capacity, Cap3 to B's Capacity, Cap4 to C's Capacity, confirm A is Rugby and C is Soccer, then the settlement screen appears.
Momentos-chave
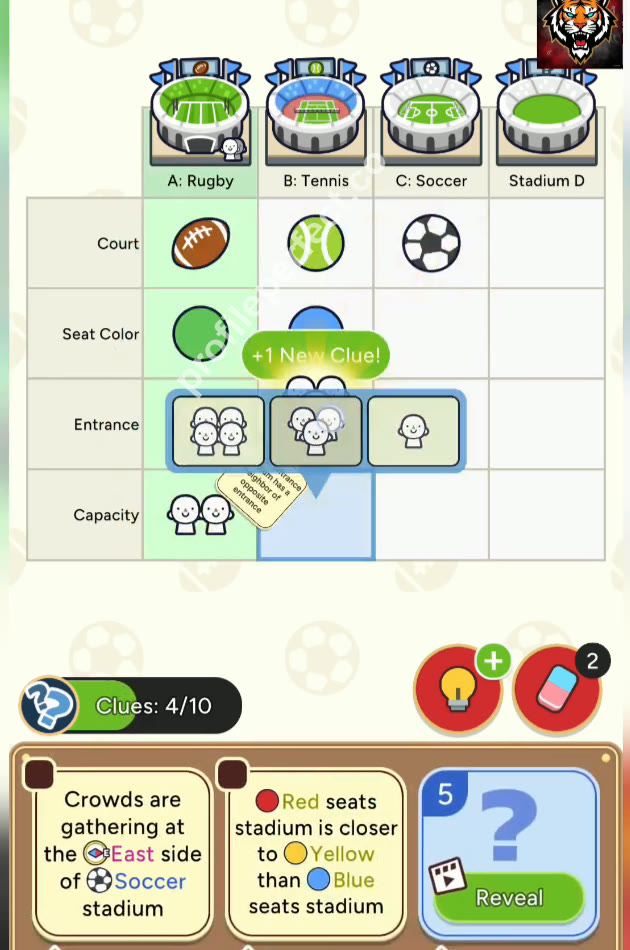
Três quadros da execução vencedora: o tabuleiro inicial, meio da resolução e a grelha completa.
Pistas mais complicadas
Neighbor rule misread
The clue says the East entrance stadium has a neighbor of opposite entrance. Some players forget that adjacent means directly next to it, so they pick the wrong side. Always check which stadium is literally next to the East one.
Capacity link ignored
The clue 'Red seats stadium has the smallest capacity' is easy to overlook after placing the red seat card. If you don't connect it to the Capacity slot, you'll leave D's capacity empty until the end.
Verificação final
This level is all about chaining clues together. The fixed sport labels on the board give you a foothold, then the entrance clue opens up the neighbor rule. Seat colors are mostly direct statements, but the capacity link forces you to hold onto the red seat information until the end. If you translate each clue into a card placement in order, the grid fills naturally without guessing.
Perguntas frequentes
Qual é a solução do Profile Perfect Nível 162?
Esta página tem a grade de solução completa do Nível 162 "A linha do estádio", mantida dentro de uma proteção de spoiler — abra-a e copie para o jogo, ou comece pelas dicas em camadas se quiser resolver primeiro.
Quantas dicas existem para o Profile Perfect Nível 162?
Três, em força crescente: um leve empurrão, a pista principal destacada, depois o passo decisivo. As dicas são desbloqueadas uma de cada vez, para que você possa parar assim que o caso fizer sentido.
Como resolver o Profile Perfect Nível 162 sem reforços?
Siga a seção passo a passo: ancore as pistas diretas primeiro, varra as pistas negativas para eliminações, depois encadeie as pistas posicionais e de comparação. O Nível 162 é totalmente solucionável sem gastar um único reforço.
Por que perdi uma vida no Profile Perfect Nível 162?
Um toque em um par não comprovado queima uma tentativa. A lista de Pistas Enganosas nesta página cobre as células exatas que os jogadores tocam erroneamente neste quadro — verifique-as duas vezes antes de confirmar.
O Profile Perfect Nível 162 é Difícil?
O quadro "A linha do estádio" está na dificuldade esperada para esta fase: uma contagem justa de pistas com uma ou duas redações fáceis de serem lidas errado. Seguir a ordem das dicas mantém confortável.
Qual nível vem depois do Profile Perfect Nível 162?
Nível 163. Use os botões anterior / próximo na parte inferior desta página, ou volte ao índice completo de níveis para navegar por número.