






Profile Perfect Nivel 162 — Pista por pista y solución
"La alineación del estadio" — una escalera de cuatro capas: una solución con un clic, pistas por pista que aumentan, la lógica explicada y la solución completa. Toma solo la capa que necesitas.
Solución
¿Solo buscas la solución? Abre el panel de abajo y copia la cuadrícula en el juego: no se estropea nada más.
SpoilerRevelar la cuadrícula de solución
| Personajes | Personaje | Court | Seat Color | Entrance | Capacidad |
|---|---|---|---|---|---|
| Estadio A | Rugby | Verde | Sur | Cap2 | |
| Estadio B | Tenis | Azul | Oeste | Cap3 | |
| Estadio C | Fútbol | Amarillo | Este | Cap4 | |
| Estadio D | Béisbol | Rojo | Norte | Cap1 |
Pistas por pista
Las pistas por pista se desbloquean una a una: abre la Pista por pista 1, y solo entonces aparece la Pista por pista 2. Detente en cuanto el caso haga clic.
Pista por pista 1 Toca para revelar
Start with the stadium that already has its sport labeled on the board. The entrance clue tells you where to put the first two direction cards.
Pista por pista 2 Toca para revelar
Pay attention to the neighbor rule about entrances, and the seat color clues that link sports to colors.
Pista por pista 3 Toca para revelar
Once red seats are placed, the capacity clue directly ties to that stadium. The rest fills in by elimination.
Videoguía
Mira la resolución completa: el tablero, las tarjetas de pistas del caso y cada colocación en orden — cada paso más abajo está anclado al momento en que ocurre en la ejecución.
-
1 Set East entrance for Stadium C and South for Stadium A 0:00 – 0:06
Place the first two entrance directions based on the opening clues.
Drag the East card to Stadium C's Entrance slot, and the South card to Stadium A's Entrance slot.
-
2 Assign Green to A and Blue to B 0:06 – 0:13
Fill in seat colors for A and B using direct color clues.
Drag the Green card to Stadium A's Seat Color slot, and the Blue card to Stadium B's Seat Color slot.
-
3 Set West entrance for B and Yellow for C 0:13 – 0:20
Use the neighbor entrance rule and the distance clue to complete B's entrance and C's seat color.
Confirm Stadium B has Tennis as its sport, drag the West card to B's Entrance slot, and drag the Yellow card to C's Seat Color slot.
-
4 Give Red to D and North entrance to D 0:20 – 0:24
Complete D's seat color and entrance by elimination.
Drag the Red card to Stadium D's Seat Color slot, and the North card to Stadium D's Entrance slot.
-
5 Set Baseball and Cap1 for D 0:24 – 0:28
Assign the remaining sport and the smallest capacity to D.
Drag the Baseball card to Stadium D's Court slot, and the Cap1 card to D's Capacity slot.
-
6 Fill remaining capacities and confirm sports 0:28 – 0:33
Complete A, B, C capacities and verify the final grid to win.
Drag Cap2 to A's Capacity, Cap3 to B's Capacity, Cap4 to C's Capacity, confirm A is Rugby and C is Soccer, then the settlement screen appears.
Momentos clave
Tres fotogramas de la ejecución ganadora: el tablero inicial, a mitad de resolución y la rejilla completada.
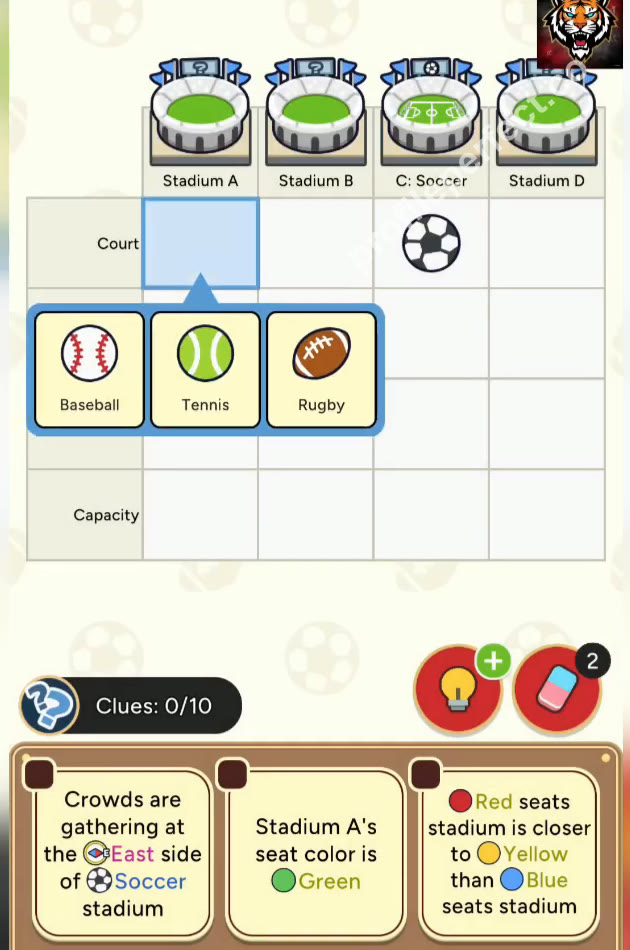
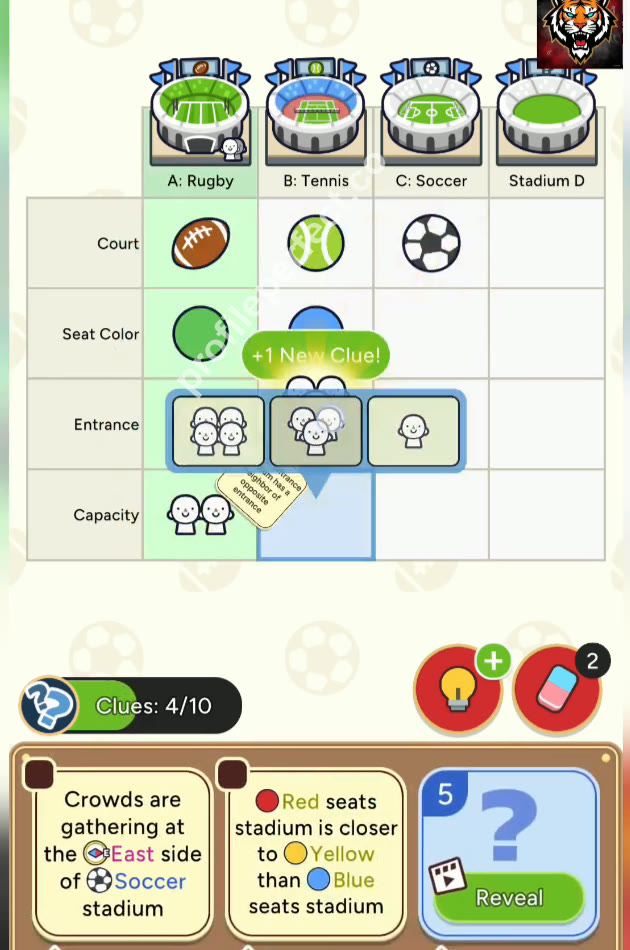
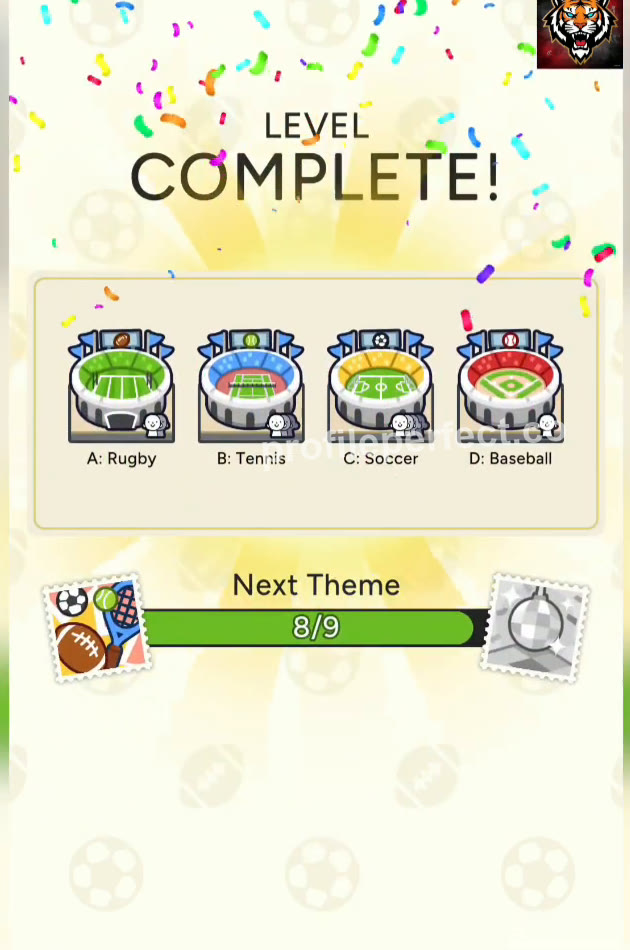
Pistas del caso más engañosas
Neighbor rule misread
The clue says the East entrance stadium has a neighbor of opposite entrance. Some players forget that adjacent means directly next to it, so they pick the wrong side. Always check which stadium is literally next to the East one.
Capacity link ignored
The clue 'Red seats stadium has the smallest capacity' is easy to overlook after placing the red seat card. If you don't connect it to the Capacity slot, you'll leave D's capacity empty until the end.
Comprobación final
This level is all about chaining clues together. The fixed sport labels on the board give you a foothold, then the entrance clue opens up the neighbor rule. Seat colors are mostly direct statements, but the capacity link forces you to hold onto the red seat information until the end. If you translate each clue into a card placement in order, the grid fills naturally without guessing.
Preguntas frecuentes
¿Cuál es la solución del nivel 162 de Profile Perfect?
Esta página tiene la cuadrícula de solución completa del nivel 162 "La alineación del estadio", guardada dentro de una protección contra spoilers: ábrela y cópiala en el juego, o comienza con las pistas por pista si quieres resolverlo tú primero.
¿Cuántas pistas por pista hay para el nivel 162 de Profile Perfect?
Tres, en intensidad creciente: un empujón suave, la pista del caso clave señalada, luego el paso decisivo. Las pistas por pista se desbloquean una a una, para que puedas parar en cuanto el caso tenga sentido.
¿Cómo resolver el nivel 162 de Profile Perfect sin potenciadores?
Sigue la sección paso a paso: ancla primero las pistas directas, barre las pistas negativas para eliminaciones, luego encadena las pistas de posición y de comparación. El nivel 162 se puede resolver completamente sin gastar un solo potenciador.
¿Por qué perdí una vida en el nivel 162 de Profile Perfect?
Un toque en un par no comprobado quema un intento. La lista de Pistas del Caso Engañosas en esta página cubre las celdas exactas donde los jugadores tocan mal en este tablero: verifícalas antes de confirmar.
¿El nivel 162 de Profile Perfect es difícil?
El tablero "La alineación del estadio" está en la dificultad esperada para este tramo: una cantidad justa de pistas del caso con una o dos redacciones fáciles de malinterpretar. Seguir el orden de las pistas por pista lo mantiene cómodo.
¿Qué nivel viene después del nivel 162 de Profile Perfect?
Nivel 163. Usa los botones anterior/siguiente al final de esta página, o vuelve al índice completo de niveles para explorar por número.