






Profile Perfect Nivel 202 — Pista por pista y solución
"El rompecabezas de la fuga" — una escalera de cuatro capas: una solución con un clic, pistas por pista que aumentan, la lógica explicada y la solución completa. Toma solo la capa que necesitas.
Solución
¿Solo buscas la solución? Abre el panel de abajo y copia la cuadrícula en el juego: no se estropea nada más.
SpoilerRevelar la cuadrícula de solución
| Personajes | Personajes | Wall Marking | Bed | Escape Tool | Recluso | Momento del día |
|---|---|---|---|---|---|---|
| Celda A | Póster | Hamaca | Cuchara | Shin | Mediodía | |
| Celda B | Lines | Wooden Bed | Bedsheet Rope | Theo | Mediodía | |
| Celda C | Scratches | Bunk Bed | Spoon / Map | Jenny | Noche | |
| Celda D | None | Mattress | Guard Uniform | Dave / Edward | Mañana | |
| Celda E | Graffiti | Metal Bed | Llave | Silvy | Tarde |
Pistas por pista
Las pistas por pista se desbloquean una a una: abre la Pista por pista 1, y solo entonces aparece la Pista por pista 2. Detente en cuanto el caso haga clic.
Pista por pista 1 Toca para revelar
People and their habits are the easiest anchors; use them to pin down a bed or a wall first.
Pista por pista 2 Toca para revelar
When two inmates share a cell, that cell's bed is not a real bed. Also watch the column distance between a bed and a noon cell.
Pista por pista 3 Toca para revelar
After placing the times, finish beds and walls by elimination; only then fill the escape tools in the last row.
Videoguía
Mira la resolución completa: el tablero, las tarjetas de pistas del caso y cada colocación en orden — cada paso más abajo está anclado al momento en que ocurre en la ejecución.
-
1 Anchor Theo and the Wooden Bed 0:00 – 0:05
Use the goatee clue to place Theo and the Wooden Bed in Cell B, then use the no-graffiti clue to set Cell C's wall marking.
Drag Theo to Cell B's Inmate slot, drag the Wooden Bed card to Cell B's Bed slot, drag the Scratches card to Cell C's Wall Marking slot.
-
2 House the Two Guys on a Mattress 0:05 – 0:10
Resolve the shared-cell clue by placing both inmates and the mattress in Cell D.
Drag the Dave / Edward card to Cell D's Inmate slot, drag the Mattress card to Cell D's Bed slot.
-
3 Place the Hammock and Silvy, Then Pin Shin's Poster 0:10 – 0:15
Use the Hammock-Silvy distance clue to place the Hammock in Cell A and Silvy in Cell E, then use Shin's poster clue for Cell A.
Drag the Hammock card to Cell A's Bed slot, drag Silvy to Cell E's Inmate slot, drag Shin to Cell A's Inmate slot, drag the Poster card to Cell A's Wall Marking slot.
-
4 Place Jenny in the No-Sunlight Cell 0:15 – 0:20
Use the sunlight clue to set Cell C's time of day and inmate.
Drag the Night card to Cell C's Time of Day slot, drag Jenny to Cell C's Inmate slot.
-
5 Place the Metal Bed Four Columns Away from Noon 0:20 – 0:25
Use the column-distance clue to place the Metal Bed in Cell E.
Drag the Metal Bed card to Cell E's Bed slot.
-
6 Let Edward Clean the Wall and Set Evening 0:25 – 0:30
Resolve Edward's clean-wall clue and place the Evening time slot.
Drag the None card to Cell D's Wall Marking slot, drag the Evening card to Cell E's Time of Day slot.
-
7 Finish Times, Beds, and Wall Markings 0:30 – 0:36
Fill the remaining time slots, the last bed, and the last wall marking by elimination.
Drag Noon to Cell A's and Cell B's Time of Day slots (two cards), drag Morning to Cell D's Time of Day slot, drag the Bunk Bed card to Cell C's Bed slot, drag the Graffiti card to Cell E's Wall Marking slot.
-
8 Fill in All Escape Tools 0:36 – 0:42
Place the five escape tools to complete the grid and trigger the victory screen.
Drag the Spoon card to Cell A's Escape Tool slot, drag the Bedsheet Rope card to Cell B's Escape Tool slot, drag the Spoon / Map card to Cell C's Escape Tool slot, drag the Guard Uniform card to Cell D's Escape Tool slot, drag the Key card to Cell E's Escape Tool slot. When all slots are filled, the victory screen appears.
Momentos clave
Tres fotogramas de la ejecución ganadora: el tablero inicial, a mitad de resolución y la rejilla completada.
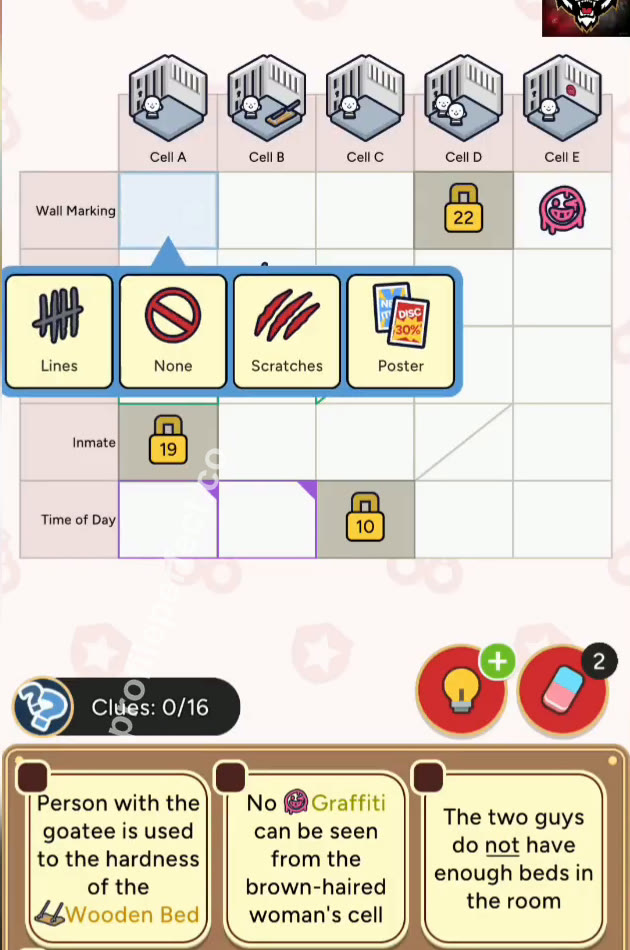
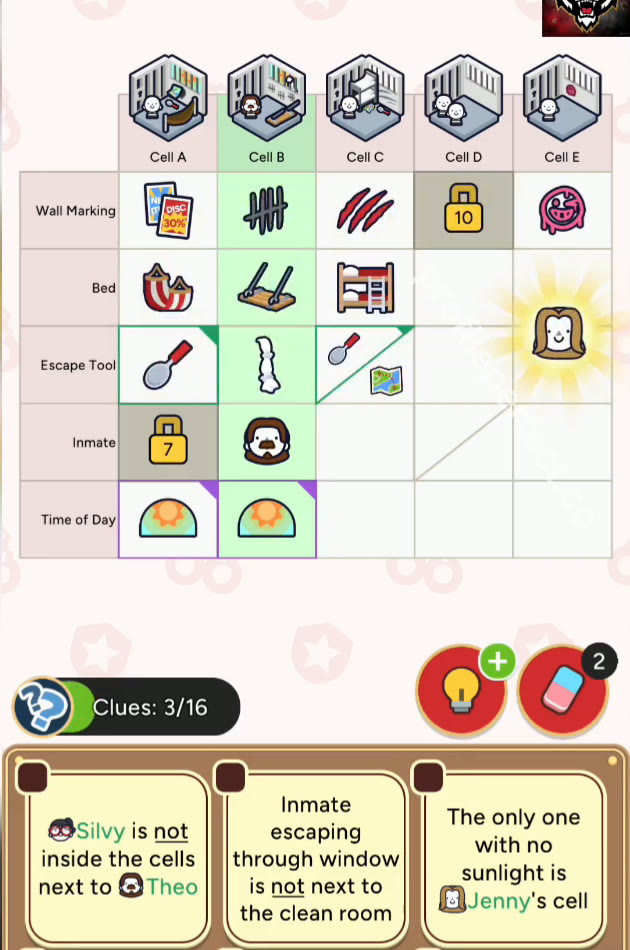
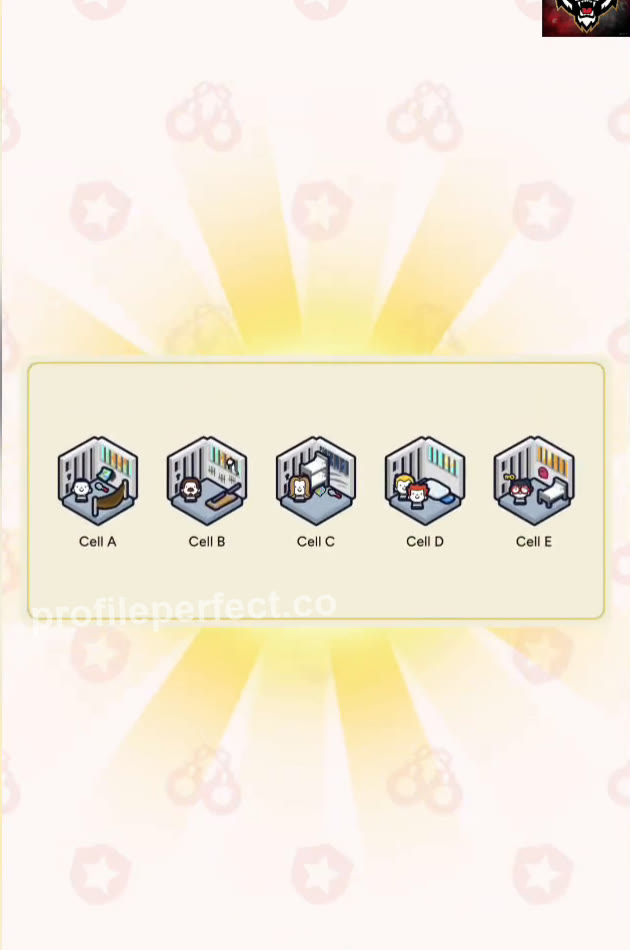
Pistas del caso más engañosas
Don't forget the combo tool
Cell C's escape tool is Spoon / Map, one card with two items. If you try to place only Spoon or only Map, the slot won't accept it. Keep the combined card in mind.
Count from the correct Noon cell
The Metal Bed is 4 columns away from the room at Noon. With Noon in Cells A and B, you need to count from Cell A to reach E. If you count from Cell B, you'll look for a sixth column that doesn't exist.
Comprobación final
Start with person-specific clues because they anchor the grid. The shared-cell clue removes a real bed, and the column-distance clue pins the metal bed. Deduction fills the rest; save escape tools for last since they are the most flexible. Watch out for the Spoon / Map combo card — it looks like two tools but takes one slot.
Categorías en este nivel
Cada tablero mezcla categorías cotidianas. Explora las que utiliza este rompecabezas — cada una enlaza a todos los niveles que la incluyen.
Preguntas frecuentes
¿Cuál es la solución del nivel 202 de Profile Perfect?
Esta página tiene la cuadrícula de solución completa del nivel 202 "El rompecabezas de la fuga", guardada dentro de una protección contra spoilers: ábrela y cópiala en el juego, o comienza con las pistas por pista si quieres resolverlo tú primero.
¿Cuántas pistas por pista hay para el nivel 202 de Profile Perfect?
Tres, en intensidad creciente: un empujón suave, la pista del caso clave señalada, luego el paso decisivo. Las pistas por pista se desbloquean una a una, para que puedas parar en cuanto el caso tenga sentido.
¿Cómo resolver el nivel 202 de Profile Perfect sin potenciadores?
Sigue la sección paso a paso: ancla primero las pistas directas, barre las pistas negativas para eliminaciones, luego encadena las pistas de posición y de comparación. El nivel 202 se puede resolver completamente sin gastar un solo potenciador.
¿Por qué perdí una vida en el nivel 202 de Profile Perfect?
Un toque en un par no comprobado quema un intento. La lista de Pistas del Caso Engañosas en esta página cubre las celdas exactas donde los jugadores tocan mal en este tablero: verifícalas antes de confirmar.
¿El nivel 202 de Profile Perfect es difícil?
El tablero "El rompecabezas de la fuga" está en la dificultad esperada para este tramo: una cantidad justa de pistas del caso con una o dos redacciones fáciles de malinterpretar. Seguir el orden de las pistas por pista lo mantiene cómodo.
¿Qué nivel viene después del nivel 202 de Profile Perfect?
Nivel 203. Usa los botones anterior/siguiente al final de esta página, o vuelve al índice completo de niveles para explorar por número.