






Profile Perfect Level 200 Hinweise & Lösung
„Das Gefangenen-Essen“ – eine Leiter mit vier Ebenen: eine Lösung auf einen Klick, Hinweise, die schrittweise stärker werden, die erklärte Logik und die vollständige Lösung. Nimm nur die Ebene, die du brauchst.
Lösung
Nur wegen der Lösung hier? Öffne das Panel unten und kopiere das Gitter ins Spiel – nichts anderes wird verraten.
SpoilerLösungsgitter anzeigen
| Person | Personen | Tray Color | Hauptgericht | Getränk | Calories (kcal) |
|---|---|---|---|---|---|
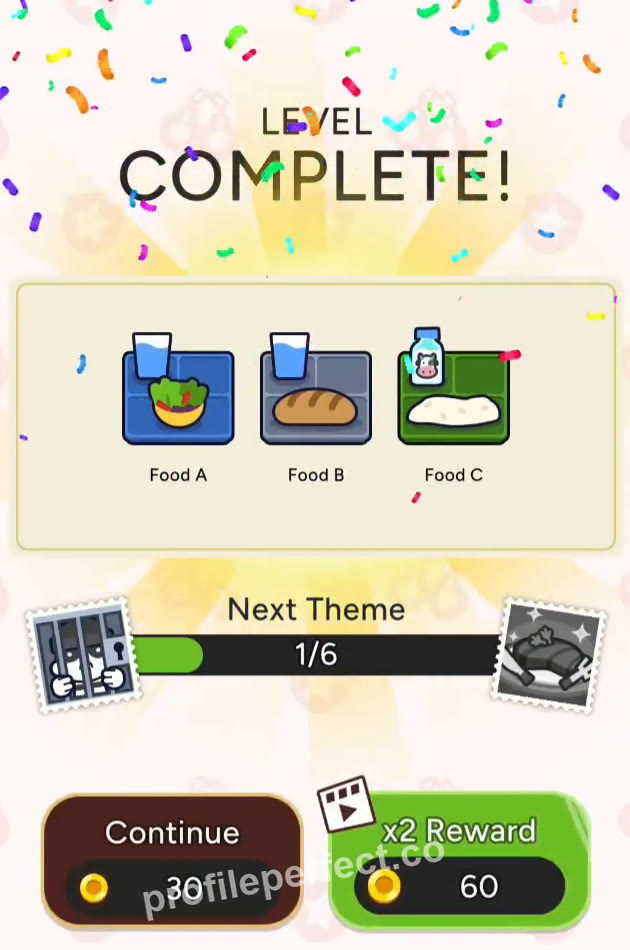
| Essen A | Blau | Salad | Wasser | 15 | |
| Essen B | Grau | Brot | Wasser | 140 | |
| Essen C | Grün | Gruel | Milch | 200 |
Tipps
Tipps werden nacheinander freigeschaltet: Öffne Tipp 1, und erst dann erscheint Tipp 2. Höre auf, sobald der Fall klar ist.
Tipp 1 Tippen zum Anzeigen
Start with the two main courses tied by the 'not neighbors' clue; they can't be side by side, so they must be split to opposite ends.
Tipp 2 Tippen zum Anzeigen
The 'Gruel is the only food accompanied by Milk' clue and the calorie comparison together tell you where the middle main course belongs, and where the 15 kcal goes.
Tipp 3 Tippen zum Anzeigen
After the main courses and calories are fixed, the remaining drinks and tray colors are just fill-ins — every empty slot has only one possible card.
Video-Anleitung
Sehen Sie sich die vollständige Lösung an: das Raster, die Hinweiskarten und jede Platzierung in der richtigen Reihenfolge – jeder Schritt unten ist mit dem Moment verknüpft, in dem er im Durchlauf passiert.
-
1 Salad and Gruel Are Not Neighbors 0:00 – 0:06
Place the two named main courses so they are separated from each other.
Drag the Salad main-course card to Food A's Main Course slot, and the Gruel main-course card to Food C's Main Course slot.
-
2 Milk Goes with Gruel, Bread Goes to Food B 0:06 – 0:13
Use the milk-exclusive clue and the calorie comparison to fill C's drink, B's main course, and A's calories.
Drag the Milk drink card to Food C's Drink slot, the Bread main-course card to Food B's Main Course slot, and the 15 kcal card to Food A's Calories slot.
-
3 Complete the Calorie Row 0:13 – 0:19
Fill the remaining empty calorie cells using the calorie ratio.
Drag the 140 kcal card to Food B's Calories slot, and the 200 kcal card to Food C's Calories slot.
-
4 Finish Tray Colors 0:19 – 0:24
Fill all three tray color cells to complete the row.
Drag the Blue tray-color card to Food A's Tray Color slot, the Gray tray-color card to Food B's Tray Color slot, and the Green tray-color card to Food C's Tray Color slot.
-
5 Clean Up the Drink Row 0:24 – 0:28
Place Water in the final two drink slots to complete all 12 cells and clear the level.
Drag the Water drink card to both Food A's and Food B's Drink slots (two cards). Once all 12 cells are filled correctly, the victory screen appears.
Schlüsselmomente
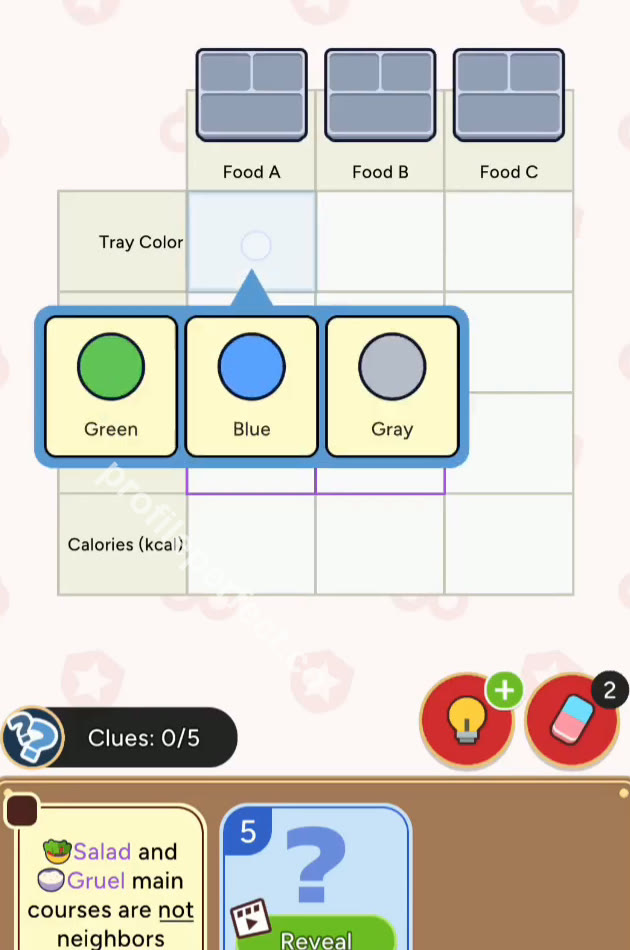
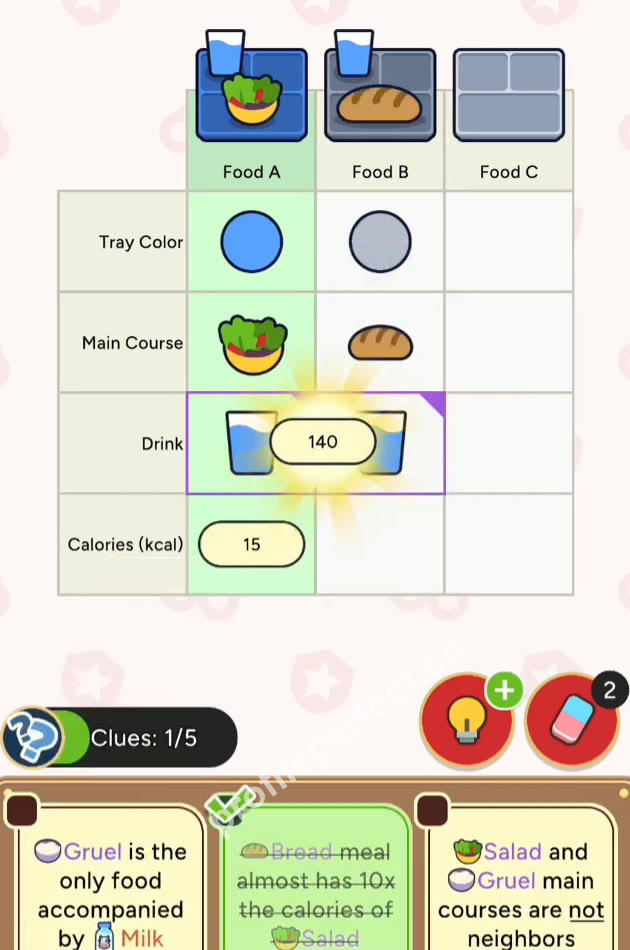
Drei Bilder aus dem erfolgreichen Durchlauf: das Anfangsraster, die Mitte der Lösung und das vollständig ausgefüllte Gitter.
Kniffligste Hinweise
Don't flip the calorie ratio
The clue says Bread has almost 10x the calories of Salad, so Salad is 15 and Bread is 140. If you put 15 on Bread, the calorie column won't match the clue.
Milk only goes with Gruel
Gruel is the only food served with Milk, so Milk must be on Food C. Don't be tempted to use Milk for other empty drink slots; Water is what fills the remaining two.
Abschließende Kontrolle
Start with the most restrictive clues: the two main courses that cannot be adjacent, and the drink that belongs only to Gruel. Once those are placed, the calorie ratio locks in the remaining numbers, and the last two categories are simple fill-ins. Let each clue force exactly one cell before dragging the next card.
Häufig gestellte Fragen
Wie lautet die Lösung zu Profile Perfect Level 200?
Diese Seite enthält das vollständige Lösungsraster für Level 200 "Das Gefangenen-Essen", geschützt durch eine Spoiler-Warnung – öffne es und kopiere es ins Spiel, oder beginne mit den gestaffelten Tipps, wenn du es zuerst selbst lösen möchtest.
Wie viele Tipps gibt es für Profile Perfect Level 200?
Drei, mit steigender Stärke: ein sanfter Schubs, der entscheidende Hinweis genannt, dann der entscheidende Schritt. Tipps werden nacheinander freigeschaltet, sodass du aufhören kannst, sobald der Fall klar ist.
Wie löse ich Profile Perfect Level 200 ohne Booster?
Befolge den Schritt-für-Schritt-Abschnitt: verankere zuerst die direkten Hinweise, streife negative Hinweise auf Ausschlüsse ab, dann verknüpfe die Positions- und Vergleichshinweise. Level 200 ist vollständig lösbar, ohne einen einzigen Booster auszugeben.
Warum habe ich bei Profile Perfect Level 200 ein Leben verloren?
Ein Tippen auf ein unbewiesenes Paar kostet einen Versuch. Die Liste der kniffligen Hinweise auf dieser Seite deckt die genauen Zellen ab, die Spieler auf diesem Brett falsch antippen – überprüfe sie doppelt, bevor du dich festlegst.
Ist Profile Perfect Level 200 schwer?
Das Brett "Das Gefangenen-Essen" hat den erwarteten Schwierigkeitsgrad für diesen Abschnitt: eine angemessene Anzahl von Hinweisen mit ein oder zwei leicht falsch lesbaren Formulierungen. Wenn du der Tipp-Reihenfolge folgst, bleibt es angenehm.
Welches Level kommt nach Profile Perfect Level 200?
Level 201. Verwende die Zurück-/Weiter-Buttons unten auf dieser Seite oder springe zurück zum vollständigen Level-Index, um nach Nummer zu suchen.