






Profile Perfect Level 263 Hints & Answer
"The Elemental Chests" — a four-layer ladder: a one-click answer, hints that scale up, the logic explained, and the complete solution. Take only the layer you need.
Answer
Only here for the answer? Open the panel below and copy the grid into the game — nothing else gets spoiled.
SpoilerReveal the answer grid
| Subject | Subject | Material | Key | Content | Location |
|---|---|---|---|---|---|
| Chest A | Gold | Heart | Gold Coins | Ruins | |
| Chest B | Obsidian | Diamond | Ancient Scroll | Ruins | |
| Chest C | Wood | Clover | Gemstones | Jungle | |
| Chest D | Steel | Circle | Magic Potion | Ocean | |
| Chest E | Crystal | Star | Cursed Skull | Beach |
Hints
Hints unlock one at a time: open Hint 1, and only then does Hint 2 appear. Stop the moment the case clicks.
Hint 1 Tap to reveal
Some clues point to keys, some to contents, and some to places where things were lost.
Hint 2 Tap to reveal
Start with the golden chest: its key is heart-shaped and its content is coins.
Hint 3 Tap to reveal
The location slots for Chest A and B share the same ruin icon; Beach and Jungle are a final two-way choice.
Video walkthrough
Watch the full solve: the board, the clue cards, and every placement in order — each step below is anchored to the moment it happens in the run.
-
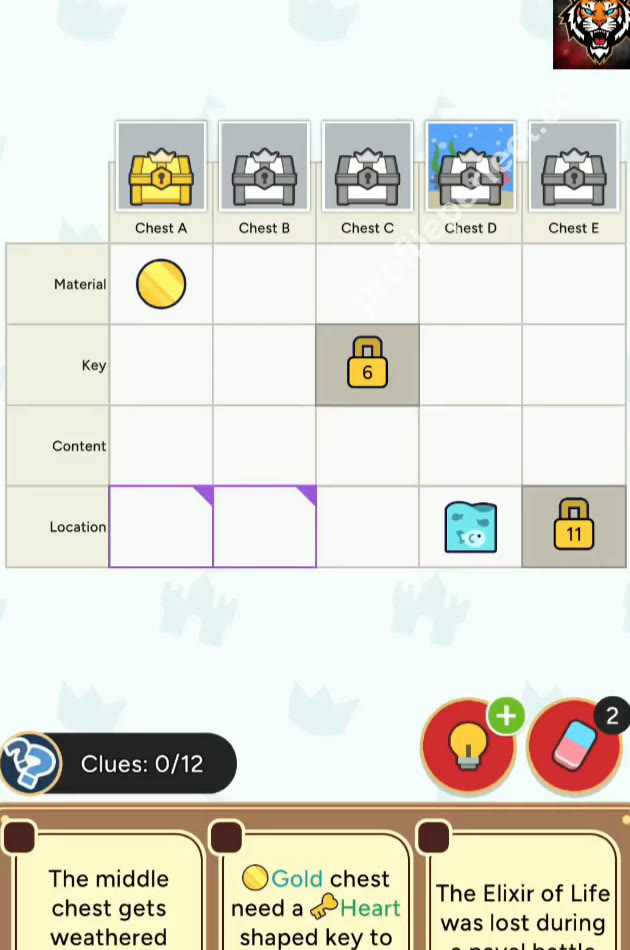
1 Read the opening clues 0:00 – 0:05
Note the weathered middle chest, the gold chest needing a heart-shaped key, and the elixir lost at sea.
Remember C=Wood (the weathered middle chest); A=Gold and A=Heart key; D=Magic Potion and D=Ocean (lost at sea, Chest D has an ocean background).
-
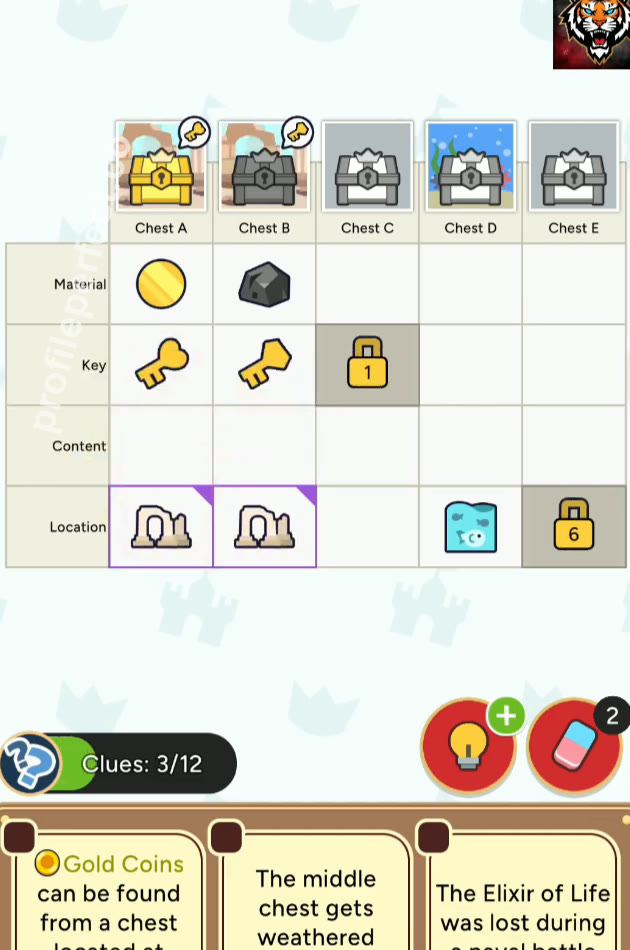
2 Assign chest materials 0:05 – 0:10
Determine the materials: A=Gold, C=Wood, B=Obsidian, D=Steel, E=Crystal.
Drag Gold to Chest A's Material slot; Wood to Chest C's; Obsidian to Chest B's; Steel to Chest D's; Crystal to Chest E's.
-
3 Set the gold chest key 0:10 – 0:15
Determine that Chest A's key is Heart.
Drag the Heart key card to Chest A's Key slot.
-
4 Fill in the first contents 0:15 – 0:20
Determine A=Gold Coins and D=Magic Potion.
Drag the Gold Coins content card to Chest A's Content slot, and the Magic Potion card to Chest D's Content slot.
-
5 Place the Ruins locations 0:20 – 0:25
Determine that both Chest A and Chest B are at Ruins.
Drag the Ruins location card to Chest A's Location slot, then to Chest B's Location slot.
-
6 Set the star key and beach 0:25 – 0:30
Determine that Chest E uses the Star key and is located at Beach.
Drag the Star key card to Chest E's Key slot, and the Beach location card to Chest E's Location slot.
-
7 Resolve Jungle and Ocean 0:30 – 0:35
Determine C=Jungle and D=Ocean.
Drag the Jungle location card to Chest C's Location slot, and the Ocean card to Chest D's Location slot.
-
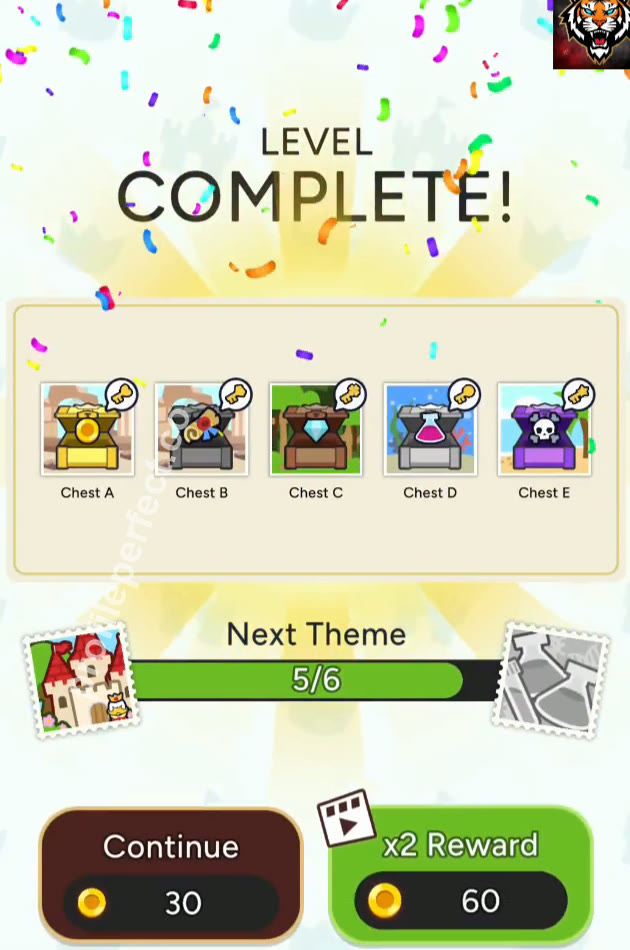
8 Finish the keys and contents 0:35 – 0:56
Set the remaining keys (D=Circle, C=Clover, B=Diamond) and contents (E=Cursed Skull, C=Gemstones, B=Ancient Scroll) to complete the level.
Drag the Circle key card to Chest D's Key slot, the Clover key card to Chest C's Key slot, and the Diamond key card to Chest B's Key slot; then drag the Cursed Skull content card to Chest E's Content slot, the Gemstones content card to Chest C's Content slot, and the Ancient Scroll content card to Chest B's Content slot. When everything is filled, the LEVEL COMPLETE settlement appears.
Key moments
Three frames from the winning run: the opening board, mid-solve, and the completed grid.
Trickiest clues
Treating the Elixir of Life as a separate item
The clue 'The Elixir of Life was lost during a naval battle' is just another name for the Magic Potion card. When you fill Chest D's content, map it directly to Magic Potion; don't go looking for an extra elixir item.
The Beach vs. Jungle location choice
Chest C only offers Jungle or Beach for its location, and Beach is already locked to Chest E by the star-key clue. Use elimination instead of guessing based on the wooden material.
Final check
Start from the strongest link: the gold chest needs a heart-shaped key and holds coins. Then lock Ocean to the Magic Potion through the naval-battle clue. Use the shared Ruins icon for Chests A and B, and solve the Beach/Jungle exclusion to place locations. Finally, distribute the remaining keys and contents by elimination to reach the level-complete screen.
Categories in this level
Every board mixes everyday categories. Browse the ones this puzzle draws from — each links to every level that features it.
Frequently asked questions
What is the answer to Profile Perfect Level 263?
This page has the complete Level 263 "The Elemental Chests" answer grid, kept inside a spoiler guard — open it and copy it into the game, or start from the layered hints if you want to solve it yourself first.
How many hints are there for Profile Perfect Level 263?
Three, in rising strength: a gentle nudge, the key clue called out, then the decisive step. Hints unlock one at a time, so you can stop as soon as the case clicks.
How to solve Profile Perfect Level 263 without boosters?
Follow the step-by-step section: anchor the direct clues first, sweep negative clues for eliminations, then chain the positional and comparison clues. Level 263 is fully solvable without spending a single booster.
Why did I lose a life on Profile Perfect Level 263?
A tap on an unproven pairing burns an attempt. The Tricky Clues list on this page covers the exact cells players mis-tap on this board — double-check them before you commit.
Is Profile Perfect Level 263 hard?
The "The Elemental Chests" board sits at the expected difficulty for this stretch: a fair clue count with one or two easily misread wordings. Following the hint order keeps it comfortable.
What level comes after Profile Perfect Level 263?
Level 264. Use the previous / next buttons at the bottom of this page, or hop back to the full level index to browse by number.