






Profile Perfect レベル 147 ヒント&答え
「緊急出動の車両」— ワンクリックで答え、段階的にヒント、ロジック解説、完全攻略の4層構造。必要な層だけをお選びください。
答え
答えだけが必要ですか?以下のパネルを開き、グリッドをゲームにコピーしてください。それ以外の情報は表示されません。
ネタバレ答えのグリッドを表示
| 登場人物 | 登場人物 | タイプ | Siren Color | Current Location | 運転手 |
|---|---|---|---|---|---|
| 救急車A | バン | 青 | 空港 | Greg | |
| 救急車B | トラック | 黄色 | 空港 | Brad | |
| 救急車C | バン | 赤 | 病院 | Jim |
ヒント
ヒントは一つずつ表示されます。ヒント1を開くと、ヒント2が現れます。ファイルの謎が解けたら、そこで止めてください。
ヒント 1 タップして表示
Start with the vehicle type — the truck is unique, so lock it in first.
ヒント 2 タップして表示
Use the driver clues to pair up the remaining vans with the right sirens and locations.
ヒント 3 タップして表示
When only one color or location is left, assign it to the last empty cell without overthinking.
動画攻略
完全な解法をご覧ください:盤面、手がかりカード、配置のすべてを順に — 以下の各ステップは、その瞬間に対応しています。
-
1 Set B as the Truck with Yellow Siren 0:00 – 0:07
Place the unique truck type and its siren color to lock in B's identity.
Drag the Truck card to Ambulance B's Type cell, and drag the Yellow card to Ambulance B's Siren Color cell.
-
2 Make A and C both Vans 0:07 – 0:15
Fill the remaining vehicle types as vans since the truck is already taken.
Drag the Van card to Ambulance A's Type cell, and drag the Van card to Ambulance C's Type cell.
-
3 Assign Brad to B, Greg to A 0:15 – 0:23
Link the drivers to the correct vehicles based on the mustache and van clues.
Drag the Brad driver card to Ambulance B's Driver cell, and drag the Greg driver card to Ambulance A's Driver cell.
-
4 Complete A's Blue and C's Red Sirens, Jim as Driver 0:23 – 0:28
Finalize the siren colors and the last driver for the remaining vans.
Drag the Blue card to Ambulance A's Siren Color cell, the Red card to Ambulance C's Siren Color cell, and the Jim driver card to Ambulance C's Driver cell.
-
5 Place the Locations and Finish 0:28 – 0:32
Complete the grid by assigning locations to all ambulances.
Drag the Airport card to Ambulance A's Current Location cell, the Airport card to Ambulance B's Current Location cell, and the Hospital card to Ambulance C's Current Location cell. All twelve cells filled.
重要な場面
クリア時の3つのフレーム:開始盤面、解法途中、完成したグリッド。
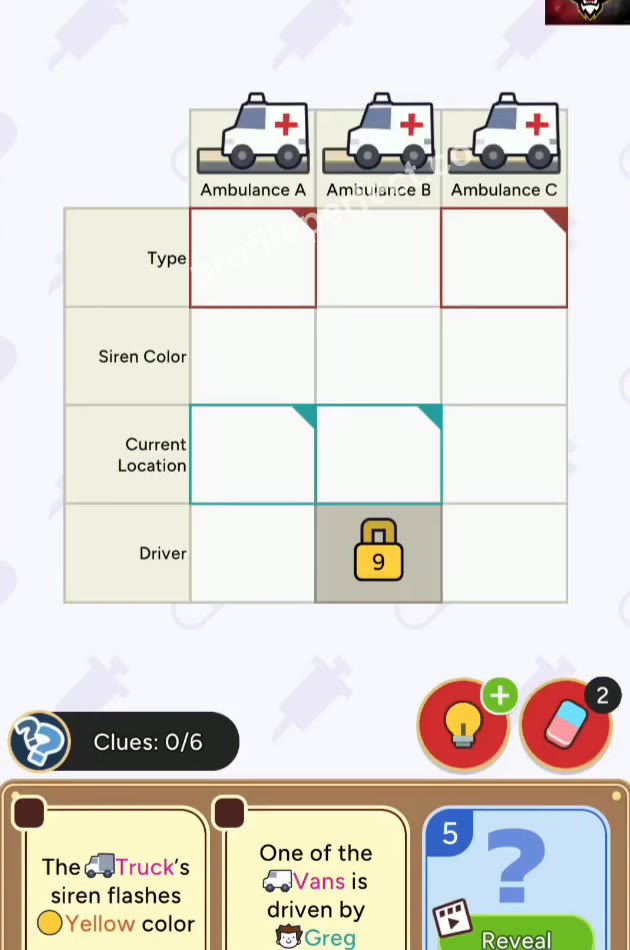
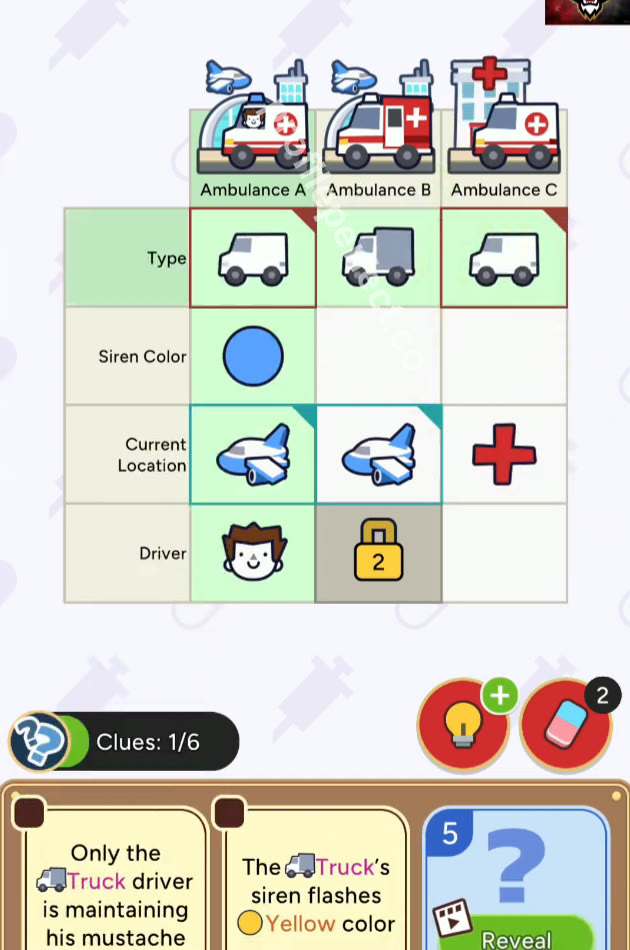
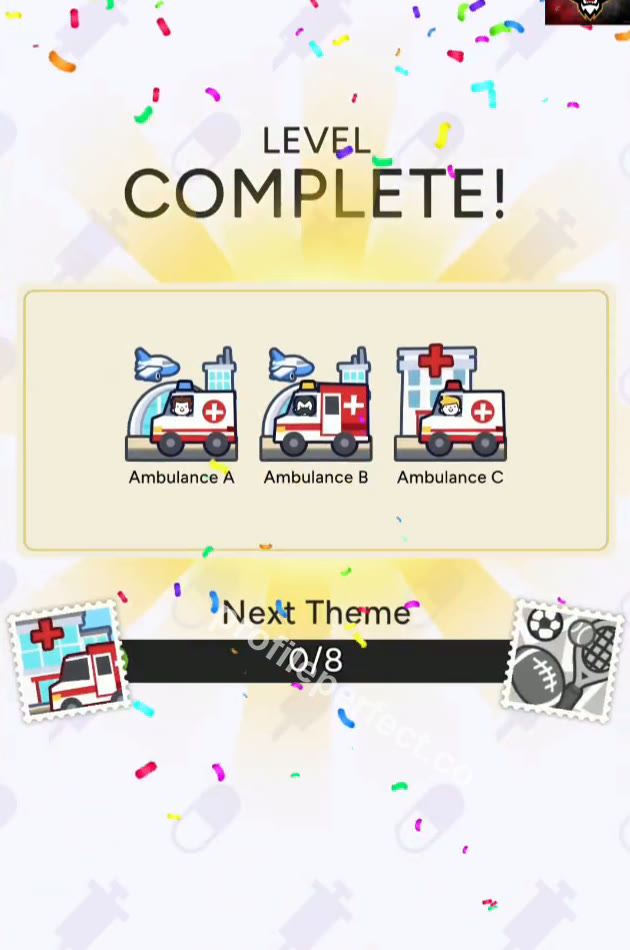
最もトリッキーな手がかり
Truck uniqueness
Players often forget that only one truck exists, so they might misplace the Yellow siren or Brad on a van. Always assign the truck first, then work through the vans.
Location mix-up
The airport has two ambulances while the hospital only one, which is easy to overlook. Check the location clues carefully and don't assume a 1-to-1 pairing for every column.
最終チェック
This level is a clear practice of elimination logic: the truck pins down a driver and siren, then the vans fall into place. The airport having two vehicles is the sneaky part, but once you see it, the finish is smooth. Keep an eye on the remaining cells and trust the process.
このレベルのカテゴリー
各ボードは日常的なカテゴリーを組み合わせています。このパズルが使用しているカテゴリーを閲覧してください — それぞれがそのカテゴリーを持つすべてのレベルにリンクしています。
よくある質問
Profile Perfect レベル147の答えは?
このページにはレベル147「緊急出動の車両」の完全な答えグリッドがネタバレ防止機能付きで掲載されています。開いてゲームにコピーするか、自分で解きたい場合は段階的なヒントから始めてください。
Profile Perfect レベル147のヒントはいくつありますか?
3つで、強度が段階的に上がります:優しいヒント、キーとなる手がかりの明示、そして決定的なステップ。ヒントは1つずつ解放されるので、パズルが解けた時点で止められます。
Profile Perfect レベル147をブースターなしで解く方法は?
ステップバイステップのセクションに従ってください:まず直接ヒントを確定し、否定ヒントで消去法を適用し、その後位置関係や比較ヒントをつなげます。レベル147はブースターを1つも使わずに完全に解けます。
Profile Perfect レベル147でライフを失ったのはなぜ?
未確定のペアをタップすると試行が消費されます。このページの「紛らわしい手がかり」リストでは、このボードでプレイヤーが誤ってタップしがちなセルを正確にカバーしています。確定する前に再確認してください。
Profile Perfect レベル147はむずかしいですか?
「緊急出動の車両」ボードはこの区間の想定難易度です。手がかり数は適切で、1~2つの読み間違えやすい表現があります。ヒント順に従えば楽に解けます。
Profile Perfect レベル147の次のレベルは?
レベル148です。このページ下部の「前へ」「次へ」ボタンを使うか、全レベル一覧に戻って番号で探してください。